Showing posts with label Vegetables. Show all posts

Monday, 5 December 2011

Matar Paneer

paneer 2

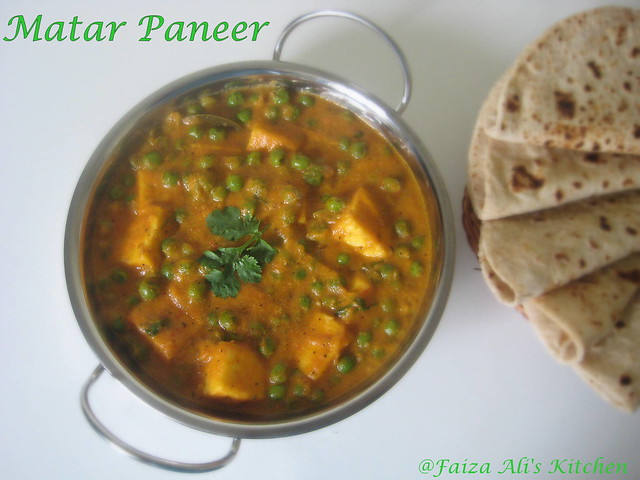
Matar paneer is a famous south Indian curry made with green peas and Indian cheese-Paneer. I have mentioned even in my earlier paneer posts that my family loves paneer dishes....if there is anything my family loves after non-veg it has to be paneer. And thus I keep trying various dishes to see those happy smiles.

And after I learned making this curry, it has become our favourite paneer dish . Specially my 4 year old son loves this curry and I still remember that day when I cooked this for the first time and my son came to me after dinner, hugged me and said ''I love you sooo much mommy and I love your cooking. Thank you for cooking this yummy paneer for me.'' Now, that was the best ever compliment I had got from my little boy. At first I thought it was because of the conversation he had with his friend that evening, which I overheard from the kitchen :)
My son : '' what did you eat for dinner today?''
His friend: ''I had soup''.
Son: ''Soup? Again? ''
Friend: ''Yes..why ?''
Son: ''Every time I ask you, you always say soup or bread and chocolate spread. You know...my mommy cooks yummy dinner everyday.''

But then, I was wrong. He really liked this even the next time and keeps asking for this dish ever time he sees paneer in our refrigerator.

And now coming to the recipe, this is a very easy recipe which will give you the same restaurant taste at home. I have made this countless times and it has never failed to impress my family and my guests. So go ahead and give it a try.
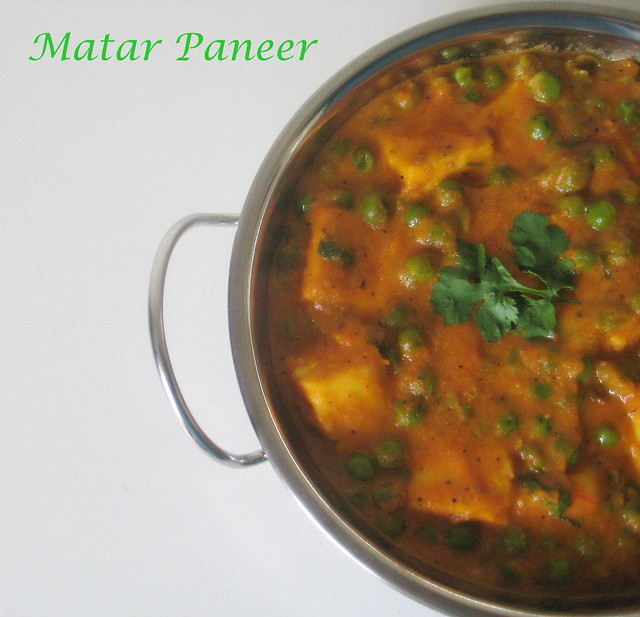
paneer 3

MATAR PANEER
Recipe source : vahrevah.com
Serves-5

Ingredients:
250 grams Paneer -cut into cubes,
1 1/2 cup Green peas,
6-7 cashew nuts,
2 medium Onions- finely chopped,
4-5 large Tomatoes,
1 tbsp ginger paste,
1 tbsp garlic paste,
1/2 cup of cooking oil,
1 tbsp of red chilli powder,
1 tsp coriander powder,
1/4 tsp turmeric powder,
1 tsp cumin powder,
1 tsp kasuri methi/dry fenugreek seeds,
2 cloves,
1 bay leaf,
2-3 cardamom pods,
1 cinnamon stick,
1/2 tsp cumin seeds,
salt to taste,
fresh coriander leaves and
cream for garnishing (optional)

paneer 1

Method:
Heat 1/4 cup of oil in a wok/ kadai, add the cashew nuts and saute till light brown, add finely chopped onions and around 1 tsp of salt. Cook till the onions turn light brown in colour, now add the turmeric powder, ginger paste and garlic paste and saute for 1-2 minutes and add finely chopped tomatoes. Cover and cook till the Tomatoes become soft -around 10-15 minutes. Blend this whole mixture to a smooth paste and keep aside.

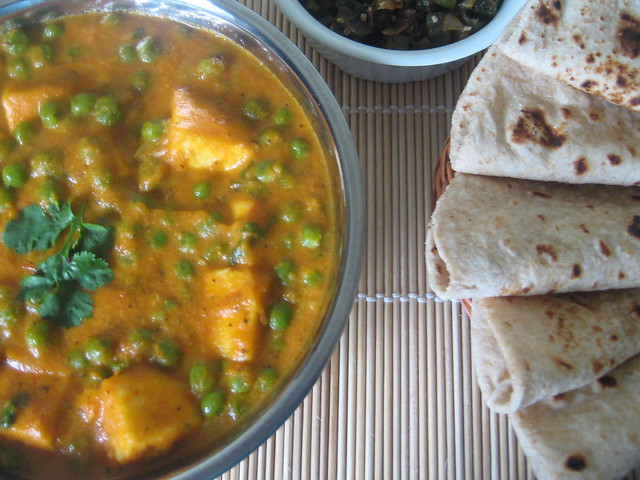
Now heat the remaining 1/4 cup of oil in the same kadai add cumin seeds, when they splutter, add the whole garam masala - bay leaf, cloves, cardamom and cinnamon and saute for 1 minute. Add the grinded smooth paste back to the kadai and add chilli powder, coriander powder, cumin powder and mix well. Add 1/2 cup of water and bring to a boil and cook on medium flame for 10-15 minutes - until the sauce thickens a little bit. Now add kasuri methi (dry fenugreek seeds), Paneer cubes and green peas and cook on low flame for further 10 minutes and switch off. Serve hot garnished with coriander leaves and cream with hot and fresh rotis or naan.

Notes:
One can use either fresh shelled green peas or frozen green peas for this recipe. If using fresh add them before adding paneer and cook for 5 minutes because thay need more time to cook. I used frozen peas for this recipe.
If you don't like whole garam masala in you curry, you can skip it and add 1/2 tsp of garam masala powder instead to the gravy.

Sending this to Priya's event CWS- Peas .

Tuesday, 22 March 2011

Curried Carrot Soup

Hi All,

I am back again with a new post after a long gap of almost 4 months and believe me it was not easy for me to stay away from my blog..but I had to because of many personal reasons. And I am sure all my blogger friends out there know how hard it gets to come out of this non-blogging habbit(specially after such a long gap). I am trying so hard to get back on the track and to post regularly like before. So, here I am with my new post or should I say my first post of this year.

Here is how I make my carrot soup.. being someone who loves spicy food, I love to have curried carrot soup instead of the bland(yet easy peasy) version , where you just boil the carrots with the stock and puree it and top it with some seasoning . So here goes the recipe for the soup...lets enjoy this hot soup one last time, before we say goodbye to cold winters and warm clothes.

CURRIED CARROT SOUP

Ingredients:
500 grams Carrots- chopped,
1 Onion-chopped,
2-3 cloves of fresh garlic -chopped,
3-4 cups Chicken stock/ vegetable stock,
1-2 tbsp butter / vegetable oil,
1 tsp red chilli powder,
1/4 tsp coriander powder,
1/2 tsp pepper powder,
a pinch of garam masala,
1/2 cup sour cream(optional)
1 tbsp fresh lemon juice and
salt to taste.

Method:
Heat the butter/ oil in a large saucepan. Add the garlic and saute for 15 -30 seconds over medium heat. Add the onions and the carrots and saute for 2-3 minutes. Add all the spices- chilli powder, pepper powder, corinader powder, garam masala and mix well and add salt to taste. Now add the stock and bring to a boil. Simmer and cook till the carrots become tender.
Puree this in a blender, in small batches until smooth . Bring back to a boil on simmer and add salt if needed. Add the lemon juice and serve hot with sour cream or Crème fraiche or freshly chopped coriander leaves.

Note:
If using store bought stock, make sure you add very liitle salt, because the stock already contain salt in it. Or check and add the salt after you puree the carrots.

I am sending this to Ramana's event - Treat to eyes:Series-2.

Friday, 19 November 2010

Bhindi do Pyaza /Stir-fried Okra

As I had written in this post that,how the other I was having a good time cooking all vegetarian food when my hubby was not in town. And also was soo happy to cook food specially for myself, which I never bother to do otherwise. So...when I cooked Tawa Pulao I wanted a vegetarian side dish instead of the usual non-veg ones. And I decided on this Bhindi do Pyaza , which I had learned from one of my friend. And loved it to the core.

Bhindi known as 'Okra' in English or 'Ladies finger' as we had always known it in India has always been my fav fav vegetable of all. I just love any and every dish with Okra. And whenever I go to an Indian store for grocery, I never fail to pick some fresh Okras (ladies finger). My favourite sabzi (side-dish) with roti has always been Bhindi. And this easy Stir-fried dish goes well with roti or rice.

This dish is called 'Do Pyaza' because of the double quantity of onions used than that found in any other style of preparation. there are many variations to this famous dish.Some use tomatoes and others even use yogurt in its preparation. But I always love to cook this with just lots of onions and some simple spices. But let me assure you that it still tastes awesome and very tasty.

BHINDI DO PYAZA

Ingredients:

400-500 grams of fresh Okra /ladies finger,
3 onion- thinly sliced,
1-2 green chillies,
1/2 tsp cumin seeds,
1/2 tsp kalonji (nigella) seeds,
1/4 tsp turmeric powder,
1/2 tsp chilli power(optional),
juice of 1/2 lemon,
2 tbsp of cooking oil and
salt to taste.

Method:
Wash the okra and dry it thoroughly by wiping it with a kitchen towel. Cut them vertically into slices. Heat the oil in a wok/ kadai and add the the sliced okra to it and stir fry for few minuted until, they are half cooked. remove them from the oil and keep aside. In the same oil add the cumin seeds and nigella see
ds. When they splutter, add the finely sliced onions and slit green chillies and cook, till the onion turns very light brown in colour. Now add turmeric powder, chilli powder(if using) and salt to taste, immediately add the stir fried okras, lemon juice to the wok and cook for further 5-8 minutes or until the okra is cooked. Serve hot with Roti or as a side dish with rice and curry.

Notes:
The first step of stir frying the Okras, is to avoid them from getting slimy and mushy, but one can skip that step completely but cook it for more time after adding the Okras. just make sure you don't cover the wok and cook for a long time, because it will end up as a slimy okra dish.

Also make sure that there is no moisture on the Bhindi/ Okra before you slice them. Even little moisture can make them slimy.


Monday, 15 November 2010

Tomato Souffle

Happy Eid-ul Adha to all my friends !! And Phew !!!After much procrastination, I finally managed to write this post, which was for sweetpunch-November as I had mentioned in my previous post.... I had made 2 dishes for this month and I was supposed to post this last week..but never got time to do so. But I finally managed to post it today :)

A souffle is a light and fluffy baked cake made with egg yolks and beaten egg whites combined with other ingredients and served as a savoury main dish or sweetened as a dessert. But I had always seen and tasted souffle as a dessert. So, When I saw this recipe from Maria's Menu, I really wanted to give it a try and I must say it was a very tasty savoury Souffle. And I would definitely make this again and again. so, without further ado, goes the recipe for this tasty Tomato Souffle.

TOMATO SOUFFLE
(Recipe source : Australian Woman's Weekly via Maria's Menu)

Ingredients:


1/2 cup bread crumbs – firmly packed
45 gm Butter
1 medium Onion –finely chopped
2 tbsp Plain flour (maida)
1 cup milk
3 tbsp tomato paste
1 tbsp fresh Basil –finely chopped (optional)
3 Eggs –separated
1/4 tsp pepper powder
Grated Cheese (mozzarella)– a handful

Method:

Grease 4 souffle dishes (1/2 cup capacity), sprinkle with breadcrumbs. Melt butter in small saucepan, add finely chopped onion. Stir over low heat for 2 mins ( or MW on HIGH for about 2 mins). Cook until onion is soft, it doesn’t have to become brown.
Stir in flour and stir over medium heat for a minute. (or MW on HIGH for a min). Remove from heat, gradually stir in milk, bring back to heat and stir over high heat until mixture boils & thickens & reaches a thick sauce like consistency. (or MW on HIGH for about 3 mins).

Transfer to large bowl, stir in tomato paste & basil leaves. Cover the dish & let it stand for 5 mins. Beat egg whites in a small bowl until soft peaks from. Add egg yolks to the onion & milk mixture & mix well. Fold the egg whites into the mixture in 2 batches. Pour the mixture evenly into the prepared dishes. Sprinkle the grated cheese on top. Bake in the preheated oven at 350 F/175C for 20- 25 mins or until lightly browned. Serve hot with garlic bread or soup.

Healthier version:

Use brown bread crumbs & low fat milk. Also use yolks of only 2 eggs & white of 3 eggs. Use only lesser qty of butter, I used only 20 grams of butter.

Notes:

The above qty serves 2 adults (main course) served with garlic bread or soup. Souffles can be baked in any oven proof dish or for individual serving, use ramekins. I baked them in small ramekins and some in an oval oven-proof dish.

The Souffle looks very puffed up wen comes out of the oven and it falls rather very quickly.So, its better to serve it hot ..just right out of the oven with some warm soup.

Verdict:

My Family just loved this to the core...specially my kid loved this. coz from past few weeks(after starting school) he has stopped eating spicy food and is always asking me to cook something less spicier than our usual India food. He was soo happy after eating this that I heard him telling his dad that night '' Dad.. I want to grow as tall as you (that would be 6.3'') so that I can beat some eggs and make tomato foushlle( for Souffle) with mommy in the kitchen :)

Friday, 5 November 2010

Tawa Pulao

First of all A very happy Diwali to all the readers !! Coming to today's recipe...its a very easy and yummy rice , which can be ready in few mins if you have cooked rice or left-over rice at home..There days when I crave for pure vegetarian food for my lunch..and thats possible only when hubby dear is out of town, because even if I cook vegetarian main dish, there has to be atleast 1 non-veg side dish with it for him. So, on one such occasion, when my better half was out of town for few days, I decided to make Tawa pulao which I had bookmarked from DK's Chef In You. Though I had tried this recipe from her blog almost 2 months back, never got a chance to post it here (as you all know how busy or rather lazy I have been past 2-3 months)

And fortunately when Priya of Priya's easy n Tasty Recipes announced that she has chosen Chef In You as the blog for this months Tried and Tasted-an event started by Zlamuksha and taken over now by Lakshmi of Kitchen Chronicles , it gave a a perfect opportunity to post this recipe.

I must admit that this pulao was soo yummy and flavourful that I have sooo fallen in love with its taste and have cooked this many times after that day. I sincerely thank DK for sharing with us this tasty recipe.

I have followed her recipe except for some changes here and there..like I added some own spices because I didn't have Pav Bhaji masala at home and instead of using both butter and vegetable oil, I
used only vegetable oil. For original recipe hop over to her lovely space here .

TAWA PULAO

Ingredients:
2-1/2 cups of cooked rice
1 1/2 tbsp of vegetable oil,
1 large onion-chopped,
2-3 tomatoes- finely chopped,
1/2 red bell pepper(capsicum)-chopped,
1/2 green bell pepper- finely chopped,
1/2 cup frozen green peas,
2-3 green chillies,
1 tsp ginger paste,
1 tsp garlic paste,
1 tsp cumin seeds,
1/2 tsp fennel seeds,
1/4 tsp turmeric powder,
1/4 tsp garam masala powder,
1/4 tsp amchoor(dry mango) powder,
1/4 tsp of red chilli powder,
1/4 tsp black pepper powder,
Cilantro for garnishing and
Salt to taste


Method:

Heat the oil in pan or kadai and add cumin seed and fennel seed. When they splutter, add the chopped onions, salt and gree
n chillies. Saute for few minutes and add ginger- garlic paste and saute for 5 more minutes . Now add the chopped tomatoes and the capsicum and cook till all the tomatoes are cooked and the oil separates from the pan. Add all the dry spices and stir well and lastly add the green peas, cooked rice and chopped cilantro. Toss it to coat the rice completely with the spices and cook for further 2-3 minutes on low flame. Serve hot with raita or any vegetarian side dish. I had made Bhindi Do pyaza (recipe to coom soon).

Saturday, 30 October 2010

Paneer Jalfrezi

If there is anything that can replace the chicken thats Paneer (Indian cottage cheese) for me. I fell in love with this cheese just 1-2 years ago and it has never failed to make me happy since then :) These days I just love to try anything that has paneer in it. The other day I spotted this recipe in one of Sanjeev kapoor's book and loved how simple it sounded..and trust me this recipe was more simple than I had thought. And the verdict was a very very tasty paneer dish. Till now Chilli paneer and Paneer Tikka was my favourite ...but now this tops them all.

Paneer Jalfrezi -a very appealing vegetarian dish. With all the colourful veggies in it.... this paneer dish is sure an eye catching food and guaranteed to tickle your tastebuds. like i said earlier its very easy to cook and tastes awesome.
In this recipe, I have used store bought Paneer. But if you want to make Paneer(Indian cheese) from scratch you see here .


PANEER JALFREZI
Recipe source- Sanjeev kapoor's book 'Recipes for Indian Kitchen'

Ingredients:
250-300 grams of Paneer,
2 onions-thickly sliced,
2 tomatoes-de seeded,
2 Green bell peppers(Capsicum),
1-2 green chillies-chopped,
2''piece of ginger-julienned,
3-4 whole red chillies,
1 tsp of cumin seeds,
1 tsp of red chilli powder,
a pinch of turmeric powder,
1/2 tsp of garam masala powder,
a few sprigs of coriander leaves(optional),
1 1/2 tbsp of vinegar,
2 tbsp of oil and
salt to taste.


Method:

Cut the paneer into 2 inch long pieces. De-seed and cut the Tomatoes and Bell peppers into 2 inch long slices.
Heat oil in a kadai/ wok and add the cumin seeds and halved whole red chillies and saute for a minute. Now add the julienned ginger and onions and saute for few minutes.Make sure you don't saute it for long, which will turn the onions very soft. Add turmeric powder, red chilli powder and stir well. Add the bell peppers(capsicum) and cook for few minutes(2-3 minutes). Now add the Paneer and toss well-to coat it completely with the spices. Add vinegar and salt and cook for 5 minutes.Finally add the tomato slices , garam masala powder and finely chopped coriander leaves and toss well. Serve hot garnished with some julienned ginger/ chopped coriander leaves.


Note:
The tomatoes should be added lastly.Adding it earlier will over cook them and make them soft. So..add them in the last.
Cooking this in a non-stick wok needs very less oil. I used less than 2 tbsp. One can use more (3 tbsp) if needed.

Saturday, 26 June 2010

Tomato and Basil Bruschetta

The weather here in UK is soo sunny and bright these days and I am loving this lovely weather and enjoying it to the fullest and thus not getting much time to post regularly and also for blog hopping.

And today's post was in drafts from more than 2 months ago..finally it got some attention and light today :)

Bruschetta pronounced as
brusˈketta is an easy an eye-catching appetizer from the country of Italy. There are many variations for the toppings but, I make it this way-which is easy and ready in few minutes, and also need very few ingredients.

TOMATO AND BASIL BRUSCHETTA

Ingredients:
1 loaf Ciabatta bread or any other hard crust bread,
2-3 tbsp of extra virgin olive oil,
2-3 cloves of garlic,
5-6 ripe plum tomatoes,
few basil leaves ,
1/4 tsp pepper powder andsalt to taste.

Method:
De-seed and chop the tomatoes into small cube and chop the basil leaves finely. In a bowl, mix the chopped tomatoes and basil leaves with salt and pepper powder and also add 1/2 tbsp of olive oil to it. Mix well and keep aside.

Slice the bread into 1"inch in thickness. Rub the slices with garlic clove ad drizzle some olive oil on the slices and toast them in an oven or over a griddle(tawa) until they turn crispy and light brown in colour. Spoon the tomato and basil mixture on the toasted slices and serve as an appetizer or a snack.


Variations: If you like your tomato topping to be soft and juicy, add some boiling water to the chopped tomatoes and mash slightly.
And if you want to make it more appealing, you can bake the slices after adding the topping and some grated cheese on top.

Note:
Traditionally Ciabatta bread loaf is used for Bruschetta, but one can use any Italian bread or any bread that has a hard crust.
Make sure the tomatoes used are ripe and red in colour,


Friday, 18 June 2010

Cajun Potatoes- Spicy Potato Wedges

This is for those who love spicy food. When I say spicy , I mean really really spicy. I made these the other day coz it needs only few ingredients and gets ready in few minutes and was perfect to munch as evening snacks and more importantly I had too many potatoes at who which were going bad :) But..it was tooooo spicy for me to handle..thought my husband loved them and relished these wedges coz he loves spicy(very very spicy ) food. Actually the ingredients given below are for a milder version. But if you are using really hot chilli powder, you can reduce or increase the chilli powder quantity according your your tastes.

SPICY POTATO WEDGES


Ingredients:
5-6 potatoes,
1 tbsp of olive oil,
1/2 tsp red chilli powder,
1/4 tsp crushed peppercorns,
1/2 tsp red chilli flakes,
1/4 tsp Oregano,
1/4 tsp thyme,
1/2 tbsp lemon juice and
salt to taste

Method:
Preheat the oven to 200° C. Wash and cut the potatoes into wedges along with the skin. In a bowl, mix all the other ingredients: chilli powder, chilli flakes, peppercorns,salt, oregano and thyme with olive oil . Add the wedges to this marinade and mix well to coat evenly. and keep aside for 10-15 minutes. Places these marinated potato wedges in an oven tray and bake for 20-30 minutes or until golden brown and cooked. Make sure to baste them with some olive oil or butter in between and to frequently turn them. Sprinkle lemon juice on the wedges and serve with tomato ketchup or any of your favorite dip.
Note:
I making this for kids, please reduce the quantity of the chilli powder and chilli flakes.
I used olive oil for basting the wedges in between. But butter or vegetable oil can also be used.

Saturday, 15 May 2010

Cauliflower and Carrot Pickle

Hurray !! This is the first pickle, which I made on my own. All these years, I had just been watching my mother and mother-in-law making yummy and mouthwatering pickles with different ingredients. And after much hesitation,I finally decided to to try some easy pickle at home.So, I started with this easy, crunchy and mouthwatering pickle with some easily available vegetables- carrot and cauliflower. And I loved the crunchiness of the veggies in this pickle. And, it was really yummy, though it was on a very spicy side :) So, without much ado, lets see the ingredients we need for this pickle.

CAULIFLOWER AND CARROT PICKLE
(adapted from vahrevah.com)

Ingredients:
1 cup florets- cut into bite size pieces,
1 cup carrots- cut into small cubes,
1/2 cup of red chilli powder,
1/4 cup mustard seed powder,
1/4 tsp fenugreek/ methi powder,
1/4 tsp turmeric powder,
1 tbsp of crushed garlic,
Juice of 1 lime and1 tbsp of salt.

For tempering:
1/2 tsp mustard seeds.
1/2 tsp cumin seeds,
a pinch of asafoetida/ hing,
2-3 whole red chillies,
6-7 pieces of garlic cloves- chopped,
few curry leaves and1/2 cup of oil.

Method:
In a dry bowl, mix all the dry spices- chilli powder, mustard powder, methi powder, turmeric powder and salt. Add the garlic paste and lime juice and mix well again. to this add the Cauliflower and carrot and mix well, keep aside.
heat the oil in a pan and add cumin and mustard seeds, add the whole red chillies- cut into small pieces, asafoetida and the chopped garlic to the oil. saute for 1-2 minutes and switch off the flame. Now add the curry leaves to the oil. Let this tempering cool completely before adding it to the vegetables. When, the tempering cools down to room temperature, add this to the vegetables and mix well . Store in sterilized glass bottle and consume within 1-2 weeks.

Note:
cool the tempering completely before adding to the vegetables, because adding it to the vegetables, while the oil is still will make the veggies saft and they will loose their crunchy texture.
The quantity of the oil can be reduced, bit it will reduce the shelf life of the pickle.

Wednesday, 12 May 2010

Chilli Potatoes

This a very easy and quick recipe and taste delicious. A must try for potato lovers like me. Potato has been my favourite vegetable since childhood. I still remember how I used to ask my mom to add potatoes in each and every curry, she used to cook :)
And that love for potatoes can still be seen. Even now,I never fail to try any potato recipe, that I come across in any recipe book. And trust me this recipe was finger lickin good(scroll down to see the verdict) : D This can be served as a side dish with fried rice or can be eaten on it own. And I am definitely going to make this again and again.

CHILLI POTATOES
(adapted from Khanakhazana.com)

Ingredients :
4 Potatoes,
1 onion- sliced,
1/2 cup of chopped spring onions,
4 whole red chillies,
6 cloves of garlic-chopped,
3 tbsp of cornstarch,
1 tsp of red chilli paste,
1 tsp of soya sauce,
1/4 tsp of sugar,
1 tbsp of vinegar,
2 tbsp of vegetable oil +
Oil for deep frying and
salt to taste.

Method:
Peel the potatoes and cut them into thick wedges. Soak these wedges in cold water for half an hour. Par- boil the potato wedges in a saucepan , drain and cool them.
Heat oil in a kadai/ wok , dust the wedges with 2 tbsp of corn starch and deep fry until crisp and golden brown. Remove and drain excess oil on a kitchen towel.
Heat the 2 tbsp of oil in a pan, break the whole red chillies into two and add them to the pan. Stir fry briefly and add the chopped garlic , sliced onion and stir fry for 1-2 minutes. now add the red chilli (blended in a quarter cup of water), soya sauce, sugar and salt to taste. Add the fried potatoes and toss them in the pan . Now add the remaining 1 tbsp of cornstarch and mix well again, add the vinegar and stir fry briefly. Garnish with chopped spring onions and serve hot.

Note:
This dish can be made even with leftover french fries.
And instead of of deep frying the wedges, they can also be baked until they turn light brown and crispy.

Sunday, 9 May 2010

Tri-colour Pulao

I have seen this pulao at many restaurants and many recipe books. Some call it Tri-colour pulao and some name it panchranga pulao, though the vegetables and ingredients used are the same. So, I was wondering what to name this pulao...If it is Panchranga Pulao which means 5 coloured rice..I couldn't count five colours. Like if you notice, there is orange carrot, yellow corn, green coloured beans, bell pepper and peas. So, where are the other 2 colours? Is it white colour of the rice and cauliflower and black colour of the spices? so, I decided that tri-colour was a better name :D ....But, do let me know, if anyone out there knows why is this Pulao called Panchranga Pulao.

Anyways ....the name doesn't matter as much as the taste does, right? So, this was very aromatic and flavourful, which we all loved. Yes...yes..even my husband and son who are not big fans of veggies loved this rice. So, here goes the recipes to this aromatic and colourful rice.
TRI-COLOUR PULAO

Recipe source:
Sanjeev kapoor's book ''Recipes for Indian kitchen''

Ingredients:
3 cups of basmati rice,
1 carrot-chopped,1 green bell pepper,
1/2 medium cauliflower,
6-8 french beans- chopped,
2 chopped onions,1/2 cup of green peas,
1/2 cup of corn kernels,
2-3 tbsp of vegetable oil,1 stick of cinnamon,
3-4 cardamoms,
3-4 cloves,
1 bay leaf,1 tsp peppercorns,
1 tsp cumin seed and
salt to taste.
Method:
Wash and soak the rice for half and hour. Finely chop the vegetables into small bite size pieces as shown in the pic above and keep aside.
heat the oil in a heavy bottomed pan and add the whole spices- cardamom, cinnamon, cloves , bay leaf, cumin seeds and peppercorns and saute briefly. Now add the onions and saute until translucent. Add carrots, cauliflower, beans, peas and corn and cook for 1-2 minutes.
Drain the water from the soaked rice and add to the vegetables and stir-fry fot 2-3 minutes.add 5-6 cups of water to the rice and add salt to taste. Bring to a boil and cook till all the water is absorbed. At this point add the green bell pepper and stir the rice. reduce the heat and cook covered for 8-10 minutes or until the rice and vegetables are cooked. Serve hot and enjoy :)

Note:
The capsicum/ green bell pepper is added in the end to maintain its crunchiness.
Turmeric powder can also be added to this pulao, to make it colourful.

I am sending this colourful pulao to Cooking with Seeds- Cumin seeds event by Priya of Priya's Easy N Tasty Recipes hosted this month by Sara of Sara's Corner.

Monday, 3 May 2010

Peppery Corn Salad

When I visited India in march, I brought some cookbooks with me to UK. No...No..I didn't buy any. My mom-in-law gave me many recipe books she had for some years now, which no one was using much at home. And as you all know..being a food blogger, we love to collect recipe books, lots and lottttts of 'em :D the one book which I loved the most is a book which has traditional Kashmiri Wazwan cuisine. My father-in-law had got this book from Kashmir many years ago. It has all the authentic and traditional Kashmiri recipes. And the other book is Sanjeev Kapoor's- ' Recipes for Indian Kitchen' which is a set of 8 books. And I must say, I am loving these recipes and these books and thats what do in my spare time- go through each and every page of these books :) All thanks to my mom-in-law for these books...I have bumped into so many yummy and delicious recipes. So, watch out for more recipes from these books.

And thus, when I was going through Sanjeev kapoor's book 'Recipes for Indian Kitchen'-Soups and Salads , this colourful salad caught my attention first..I really wanted to give it a try and I am glad I did. This salad was just delectable. I loved the crunchiness of the peppers, the sweetness of the corn and pineapple, the soft and juicy tomatoes and a lil tartness from the lemon. It was totally a perfect and mouthwatering salad for me. I am sure everyone will fall in love with this salad at the very first sight.


PEPPERY CORN SALAD

Ingredients:
2 cups of corn kernels,
1 yellow capsicum,
2 green capsicums(bell peppers),4 slices of tinned pineapple,
3 tomatoes,
1 green chilli(optional),
1/4 bunch fresh mint-chopped,1 tbsp of peppercorns-crushed,
2 tbsp of lemon juice and
salt to taste.


Method:

De-seed the yellow bell pepper, green bell peppers and tomatoes and chop them neatly into small cubes. Boil the corn kernels if using fresh corn. Cut the pineapple slices into small cubes.
In a bowl, combine the bell pepper (both green and yellow), the chopped tomatoes, chopped pineapple, corn, chopped fresh mint and chopped green chillies. Mix well and add crushed peppercorns, lemon juice and salt to taste. Serve chilled.
Note: The corn kernels should be boiled, only if using fresh ones. if using the canned one, just strain the water and wash thoroughly.
Those who don't want to bite into those green chillies and completely skip it.I would say its better, coz one cannot find it easily between those green bell peppers and chances are that your tongue will be on fire, if you bite any pieces :)

Wednesday, 21 April 2010

Mushroom Biryani

Hope everyone is having a great week with sunny and bright days. The spring makes our life more livelier and happier, right? The green grass and the colourful flowers one sees around just boosts our energy and brings a big smile on our face. Oh ! how much I love this season... though here in UK the spring starts very late, unlike the spring I have seen in US. Which is more bright and lasts for long. What disappoints me is that, here in UK even the spring and summers are very windy :( Even in spring the kids need to wear fully covered clothes and one has keep his jacket(or atleast a cardigan) and an umbrella throughout the year with him- coz first you never know, when you start feeling cold coz of the winds and then, here you never know when or where it may start raining. Seriously ..... even if its sunny outside, it may rain for few minutes and then, you feel cold and shivering for some time and then again you may say the bright sun and YES all this in one single day :) The weather here changes every few hours.Now, when I am writing this post, I am loving the bright sun outside... but when I check the temperature outside its still 7°C , which is still cold according to me. Specially after returning from India just few weeks back, where the temperature was between 37 °C and 42°C. I know...I know...I am just complaining too much and I need to move on to today's recipe.
Coming to today's recipe...First let me tell you all that I am not a big fan of mushrooms and I have never been. But, when I bought a box full of mushrooms to cook veg hot-pot for my DH, I still had lot of mushrooms left in my refrigerator and was wondering what to cook with them. Then stumbled upon this Mushrom biryani recipe from Sanjeev kapoor's book- recipes for the Indian Kitchen and wanted to give it a try. And Voila ! the Biryani turned out sooooo yummmmy. I loved the mushrooms in this biryani and have decided to cook only MUSHROOM BIRYANI , whenever I buy Mushrooms. Or should I say I have started liking Mushrooms now :)

MUSHROOM BIRYANI

Ingredients:
15-20 fresh button mushrooms,
2 cups of Basmati rice,
2 medium Onions-finely sliced,3 tomatoes,
1 tbsp of ginger paste,
1 tbsp of garlic paste,1/4 cup of fresh coriander leaves,
1/2 cup of fresh mint leaves,
1/2 cup of yogurt,5-6 strands of saffron,
1/4 cup of milk,1 bay leaf,
4 cloves,
3 green cardamoms,
1 inch stick of cinnamon,
2 tbsp of oil,2 tsp of red chilli powder,1 tbsp of coriander powder,
1/2 tbsp of crushed peppercorns,
1/2 tsp cumin powder,
1/2 tsp turmeric powder,
1/2 tsp garam masala powder and
salt to taste.
Method:
Wash and soak the rice for half an hour.Wash and cut the mushrooms into quarters.Soak the saffron in warm milk. Heat the oil in a non vessel and add cardamom, cinnamon, bay leaf and cloves. Stir fry for few minutes and add finely sliced onion to the oil and stir fry over high heat till onions turn translucent. Meanwhile puree the tomatoes in a blender/ mixer and keep aside. When onion turn translucent, add ginger garlic paste and cook for further 4-5 minutes. Add red chilli powder, coriander powder, crushed peppercorns, cumin powder and turmeric powder. Stir-fry briefly for few minutes and add the pureed Tomatoes. Cook over medium heat for few minutes until the masala becomes thick.
Meanwhile boil 4-5 cups of water in a thick bottomed vessel, add 1 tsp of salt and 1 tsp of oil (to prevent the rice from sticking). When the water starts boiling add the rice and cook till the rice is 3/4th done. Drain in a colander and keep aside.
When the masala becomes thick, add the beaten yogurt, garam masala powder and 1/2 of the finely chopped coriander and and mint leaves. stir and cook for further 5 minutes. Now add the quartered mushrooms and some salt to taste. Stir fry over high heat for 2-3 minutes and remove from heat.
Arrange the cooked rice and the mushroom masala in alternate layers in big vessel, and sprinkle the chopped coriander leaves and mint and the milk with saffron in between. The upper most layer should be of rice. Cover with a tight lid and cook on low heat for 10-15 minutes or until the rice is done. Serve hot with some raita.


Note: Instead of adding the whole garam masala to the oil, one can even add them to the boiling water before adding the rice.
One can even layer the biryani in an oven proof dish, seal tightly with an aluminum foil and cook in a preheated oven at 160 c for 15-20 minutes

Source: Sanjeev kapoor's book- recipes for Indian Kitchen.

Monday, 19 April 2010

Stuffed tomatoes

Want to try something new with tomatoes? Then here is a yummy recipe for you all... these delicious tomatoes- stuffed with vegetables can be served as a side dish with rice or chapathi or can be served as an appetizer . One can serve these stuffed tomatoes with the gravy or can just completely skip the gravy if serving as an appetizer. Here goes the recipe for these yummilicious Stuffed tomatoes...

STUFFED TOMATOES


Ingredients:
6-7 large tomatoes,
3 potatoes- boiled and mashed,2 cubes of Paneer- finely chopped,
1 small cup of green peas-boiled,
1/2 tsp of cumin powder,
1/2 tsp of coriander powder,
1/4 tsp of amchur(dry mango) powder,1/4 tsp of garam masala powder
1/2 cup of grated cheese andsalt to taste.
For gravy:
4 tomatoes-finely chopped,
2 onions-finely chopped,
1 tbsp ginger paste,1 tbsp garlic paste,
1 tsp red chilli powder,1 tsp garam masala powder,1 tsp coriander powder,
2 tbsp of vegetable oil,
1/4 cup of finely chopped coriander leaves and
salt to taste.

Method:Slice the top of each tomatoes and carefully scoop out the flesh. Reserve the scooped out flesh for the gravy. Mix together boiled and mashed Potatoes, finely chopped paneer and boiled peas. Mix in salt to taste, coriander powder, cumin powder, amchur powder(dry mango powder) and garam masala powder. Stuff this into the tomatoes, top with some grated cheese and bake in a pre heated oven at 350 F or 175 C until done- approximately 20 -25 minutes or microwave until done. Or those who don't have access to either of them can cook on the stove top- Heat a non stick pan and add 2-3 tbsp of oil to the pan and place the tomatoes and cook covered on low heat until done.For the gravy:
Heat oil and fry the onions until transparent, add ginger-garlic paste , salt, coriander powder, red chilli powder and garam masala powder. Stir well for few minutes and now add the chopped tomatoes and the reserved pulp and cook for about 5-10 minutes. Add a cup of water and cook till the gravy thicken and oil separates from the pan, garnish with coriander leaves and serve the stuffed tomatoes along with this gravy. Can be enjoyed with rice or roti .

Sunday, 24 January 2010

Egg Fried Rice

Fried rice has countless variations. Every household adapts the recipe according to their family's tastes...It is quick to make and perfect for any time of the day.This an easy breezy version of egg fried rice....it just takes few minutes to make this fried rice. I find it as the best way of finishing any leftover rice. Fried rice can be made with either freshly cooked rice which should be cooled before using or if in a jiffy, can use leftover rice. Here is my version of egg fried rice.


EGG FRIED RICE

Ingredients:
3 cups of cooked rice,
2 eggs- beaten,
1 cup of mixed vegetables,
1/2 cup of chopped spring onions,
2-3 tbsp of soy sauce,
1 tbsp of green chilli sauce,
2-3 tsp of cooking oil,
Salt and pepper powder to taste.


Method:
In a bowl, beat the eggs and add a pinch of salt and pepper to it. In a wok, heat 1 tsp of oil and add the beaten egg and scramble it and when the egg is almost cooked add the cooked and completely cooled rice to it and stir fry for 3-5 minutes. Remove the rice and egg from the wok and keep aside.In the same wok, heat 1 tsp of oil and add the mixed vegetables to it- I have used corn, green peas, carrot and 1/2 red bell pepper. Stir fry the vegetables for few minutes, add soy sauce and green chilli sauce to the vegetables and a pinch of salt and pepper powder to taste. Add the rice and egg to the wok and mix well to coat the rice completely with the sauces. Add green onions to it and stir fry again for few minutes. Garnish with some spring onions and serve hot.
It awards time again :) I have been showered with some award from near and dear blogger friends..These awards encourages me do to more and much better everytime.. they are like energy boosters for me ..Thank you friends for the awards, I will cherish these awards throughout my life.

First comes an award from the Duchess of Rose Tea Cottage..She has the most wonderful and beautiful blog I have ever ever come across... She has honored me with this beautiful award...Thanks Duchess for this most beautiful award.


Another friend Sowmya of Dew has passed this cute award to me.... Thank you so much Sowmya for this award..I really like your blog...Thats so sweet of you to pass this award to me Thanks again :)
Next comes an award from dear fried Ally of What's cooking today. I love her blog..its has many yummy, unique and new recipes.Thanks Ally for this chweeeet and cuuutttteeeee award :)


And Aparna of ladies Special Adukkala has passed the Kreative blogger award to me..Thanks Aparna for the award...This was my first award too...I have written the about me things here.Thanks again dear.

LinkWithin

Related Posts with Thumbnails