Showing posts with label Fruits. Show all posts

Friday, 15 June 2012

Eggless Date Cake (Butterless too)

DSC_0837

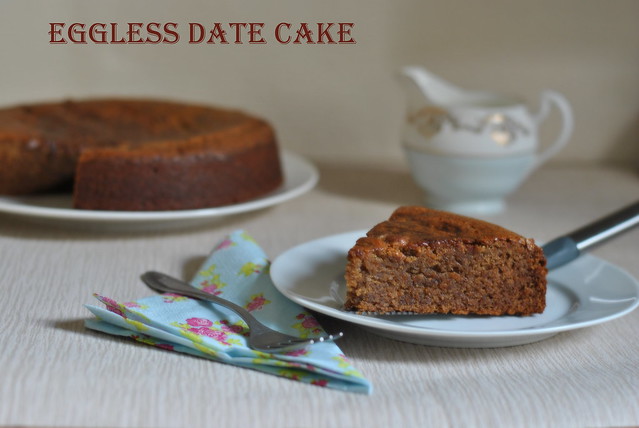
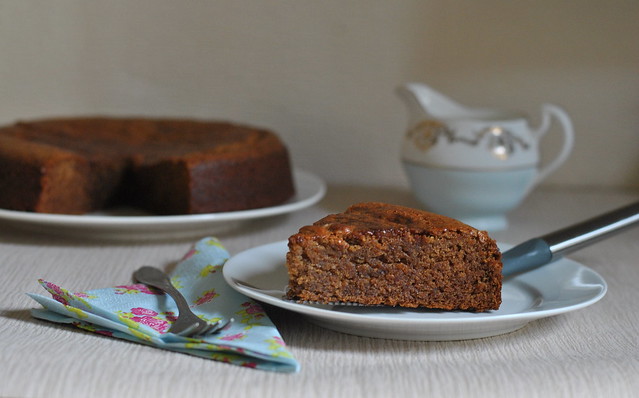
Surprised by the title? You read it right...This cake has NO EGG AND NO BUTTER ( not even a drop) And the taste? It was soo soft, spongy and absolutely delicious that I couldn't believe that it was eggless.

This is my first post for Blog-Hop Wednesdays started by Radhika of Tickling Palates. And I was paired with Nagashree of Sattvaa. Actually this post was supposed to be posted on Wednesday, but sadly I couldn't. I got too busy past few days with my 5 month old baby being unwell with flu, guests visiting us and with packing and what not...Moving is always a big hassle (specially moving countries) and what with a naughty toddler and a24/7 attention seeking baby at home....things get even messier. We have just 2 more weeks left in UK :( I am sad because we are leaving Oxford and also because I have so much packing to do yet.

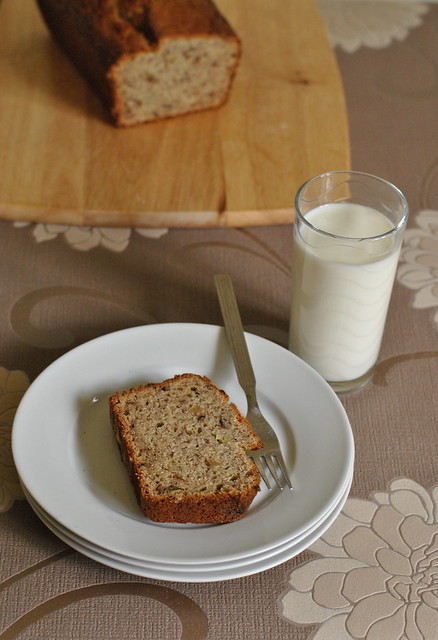
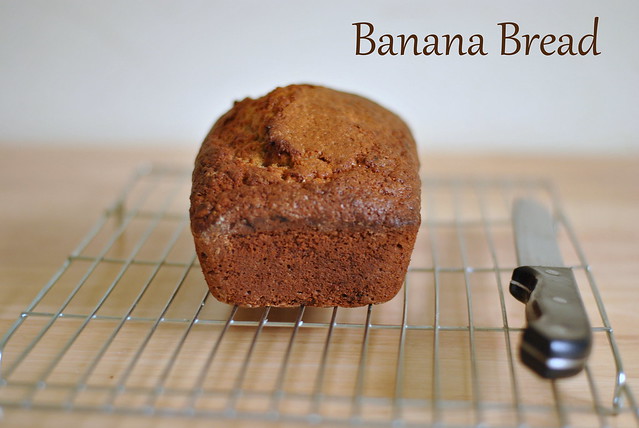
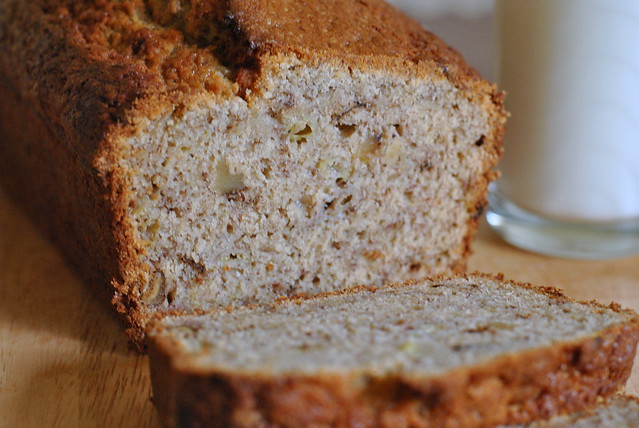
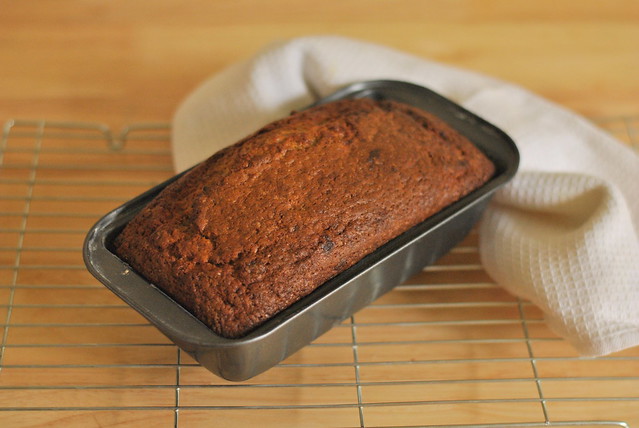
Anyways coming to today's post I was going through Nagashree's blog and found so many regional dishes and was wondering what to cook, and then our neighbor from Saudi Arabia gave us huge box of dates. And I knew I had to finish those dates within few weeks, before we leave and as I am too much in baking mood these days I decided to bake this Date Cake from her space, which she had followed from here. And I am really glad I baked this cake. My family just loved it. I will definitely bake it again and I am planning to bake in a loaf pan next time like this banana bread.
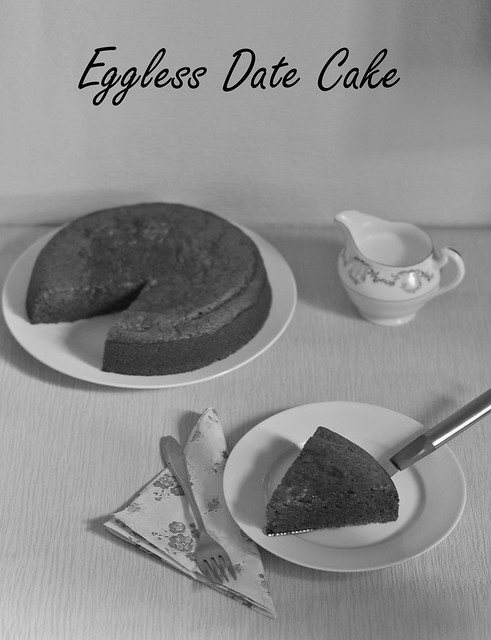
DSC_0845


EGGLESS DATE CAKE

Ingredients:

20-25 pitted Dates
1 cup milk
3/4 cup sugar
1/2 cup vegetable oil
1 cup All purpose flour/Maida
1 tsp baking soda and
1/2 cup coarsely chopped walnuts

Method:

Soak the pitted Dates in 1 cup of milk overnight or if you don't have time soak them in warm milk for 3-4 hours. Preheat oven to 350 F / 176 C . Grease and line the bottom of a cake pan and set aside.

In a blender blend together the dates, milk and sugar to a smooth paste.Sift the dry ingredients- Flour and baking soda and set aside. In a wide mouthed bowl add the smooth paste from the blender and now add the cooking oil/vegetable oil. Slowly add the dry ingredients to this and mix with a spatula/spoon until well incorporated or use a hand mixer for 1-2 minutes to mix everything well. Stir in the chopped nuts.

Pour into the prepared pan and bake for 25-30 minutes or until a toothpick inserted comes out clean. Once out of the oven, cool completely on a wire rack before slicing. Serve it just plain with tea or you can serve it with a scoop of vanilla ice-cream for dessert.

DSC_0880

Sending this to Blog- Hop 18

Wednesday, 9 May 2012

Creamy Raspberry dessert (No cook / no bake)

Who doesn't love easy-peasy recipes..I absolutely love such recipe, which have less ingredients, is ready in a jiffy and tastes yummm. This is one such recipe, which needs just 3 ingredients and is a no bake/no cook recipe.And it will definitely flatter your guests. Had seen this recipe in one of baby magazines a long time back and just fell in love with this delicious dessert. So, let me keep it short and sweet just like this recipe and move on to the recipe.

<span class=


CREAMY RASPBERRY DESSERT

Ingredients:
80 grams of Cadbury's crunchie bar,
200 ml fresh double cream and
200 grams fresh raspberries

<span class=

Method:

With a rolling pin, bash the Crunchie chocolate bars into pieces with the wrappers still on. In a bowl, whip the cream with a hand whisk or with an electric beater until you have soft peaks. Open the crunchie packs and add to the whipped cream and stir to combine well.

Spoon into the serving glass or bowl and leave overnight in the fridge to allow the honeycomb in the chocolate to mix with the cream or atleast let rest in the refrigerator for 5-6 hours. And lastly, just before serving, top it with fresh Raspberry and serve. YUMMMMY !!

<span class=

Notes:

The crunchie chocolate bar is the main ingredient which blends withe the cream and gives a creamy, chocolaty taste. And as far as I know, its available in almost many countries. If you can't find it, you can replace it with any other chocolate bar containing honeycomb.

<span class=

Sending this over to Radhika's event 'Fruit recipes'.

More similar desserts:

Strawberry Pannacotta

Blueberry Trifle

Instant Eggless Chocolate Mousse

Friday, 4 May 2012

Banana Bread

bread 4

I was so much looking forward to spring this year after the dark cold winters and also because this will be our last spring in UK but except for just a few days of sunshine and a few daffodils and tulips here and there the spring has has vanished. Its so grey, gloomy and cold again, the temperature is still in single digits and the winter jackets are still being used :(

On such boring and gloomy days, whenever I need to boost up my mood and my day I love to bake something sweet or I love to indulge myself with some hot fried Indian snack. And banana bread is one such thing which I bake again and again during these days, because I love to eat it warm and I feel it tastes best when its warm. And also because whenever I bake this bread my whole house is filled with the aroma of freshly baked bread and the heavenly aroma of cinnamon.

bread 1

Though I always have a hard time hiding bananas for baking this .Yes ! I have to hide them you know, because everyone in my house including me are banana lovers.So, they vanish in no time. So, I hide a few till they ripen and wait eagerly to bake this Bread.

I found this recipe at Joy of Baking and have baked this many times and believe me it just turns out perfect everytime I bake it and my whole family loves it. So, go ahead and see (taste) for yourselves :)

bread 5


BANANA BREAD
Recipe source: Joy Of Baking

Ingredients:

1 3/4 cup(230 grams) All purpose flour,
3/4 cup (150 grams) granulated sugar,
1 tsp baking powder,
1/4 tsp baking soda,
1 tsp cinnamon powder,
1/4 tsp salt,
1/2 cup (113 grams) unsalted butter,
2 large eggs,
3 large ripe bananas (1 1/2 cups)-mashed,
1 cup coarsely chopped Walnuts and
1 tsp vanilla extract.

bread 3

Method:

Lightly toast the walnuts in a non stick pan on low flame for 10 minutes. Remove from pan and set aside to cool. Pre-heat the oven to 350 F (180 C) and butter and flour the bottom and sides of a loaf pan. Melt the unsalted butter and let it cool.

In a large bowl mix all the dry ingredients - Flour, sugar, baking powder, baking soda, salt and cinnamon powder and add the toasted walnuts and keep aside. In another bowl beat two egg lightly with a whisk, add vanilla extract, mashed banana and lastly the melted and cooled butter. With a spatula, lightly fold the wet ingredients into the dry ingredients and mix just until combined. Pour this batter into the prepared loaf pan and bake for about 50- 60 minutes or until the top is golden brown and a toothpick inserted in the center comes out clean.Place on a wire rack to cool for around 15 minutes and then remove the bread from the pan. Serve warm or at room temperature.

bread 2

Notes:

Use big yellow bananas which should be ripe. Their skin should be black and they should be soft and sweet inside.

Don't over mix the batter as it will make the bread tough and rubbery. Just lightly fold the wet ingredients with the dry ingredients until you see a thoroughly moist batter.

Sending this over to Radhika's event 'Fruit recipes'.

Monday, 23 April 2012

Green Apple Pickle/ Chutney

&<span class=

Its peak summer in India and I am missing my homeland so much. Nooo....Not the sun and scorching heat, but I miss all those yummy juicy mangoes and also those tangy and sour green ones. Whenever my mom bought green mangoes for pickle, I used to eat sliced raw mangoes with a dash of salt and red chilli powder...YUMMMM.

Summer was the time for mango pickles.And I am sure many of you love pickles like I do. My love for yummy, spicy pickles started right from my childhood when mom used to make different kinds of pickles throughout the year. Among them my most favourite ones were mango pickle,carrot pickle and nellika (gooseberry) pickle. and now its like 'Like mommy, like Son' . My 5 year old loves pickles.Though he doesn't eat very spicy food, he won't let go of any opportunity to eat pickles.

&<span class=

And after getting married, I used to see my mother in law making grated mango chutney and I just fell in love with the taste, . And then, when we moved to USA I started missing that yummy pickle. But finally found a substitute to it while living here in UK thanks to mom in law who while visiting us one summer, saw the Green Apple tree on our premises and after tasting those sour apples, suggested about trying a grated pickle with them. And it turned out so yummy and tasted exactly(well... almost) like the mango chutney. And there has been no looking back from that day, every year I wait for summer to pluck those Apples and turn them into pickle. And when its not summer what do I do? I go ahead and buy some Granny smith apples from the supermarket to satisfy my craving :) So, here goes the recipe for it.this same recipe can be used for both -Green mangoes or Green apples.


&<span class=


GREEN APPLE PICKLE/ CHUTNEY

Ingredients:
4 granny smith apples-grated,
1/2 cup vegetable oil,
1 pod of Garlic-crushed,
1 tbsp black peppercorns-crushed,
1 sprig of fresh curry leaves,
5-6 dried whole red chillies,
1/2 tsp mustard seeds,
1 1/2 tbsp red chilli powder,
1 tsp turmeric powder,
1 tsp mustard powder- dry roasted and powdered,
1 1/2 tsp methi(fenugreek) powder- dry roasted and powdered,
1 tbsp salt or per taste.


&<span class=

Method:
Heat oil in a kadai/wok. Add mustard seeds, when they splutter, add curry leaves, dry red chilles, crushed or coarsely chopped garlic, crushed peppercorns and saute for 1-2 minutes.

Now add all the dry powders - red chilli powder, turmeric powder, mustard powder and fenugreek powder and salt and switch off the stove. Now add the grated apple to this and mix well. Add more salt if needed.

And after it cools store in a sterilized, clean air tight bottle in refrigerator.

&<span class=

Notes:


Make sure to remove all the excess moisture from the grated Apples. Also make sure you don't grate and leave the apples for a long time, as it will oxidise and changes to brown colour. Grate just before adding it to the spices.

This pickle stays in the refrigerator for at least 2 months.

Tuesday, 4 October 2011

Strawberry Panna Cotta

Hi all,

Phew !!! Finally I managed to come back to my blog after a looooong gap of 4 months. The past few months had been very very hectic and busy with summer holidays and BBQ parties many friends and relatives visiting us and not to forget my Lil boy keeping me busy througout the day and as many bloggers out there must be aware of how hard it becomes to get back on to blogging if you stay away from it for a long period of time. I really really meant to get back to my blog every day but somehow kept procrastinating it day by day and week by week and I can't tell how much I missed blogging and all my blog friends here. But I am soo happy that I FINALLY managed to sit down and write a post today :)

pannacotta 1

Today I bring to you the famous Italian dessert Panna Cotta. Its a very creamy, yummy and a very easy dessert. I am sure most of you know about panna cotta. but if you have not heard of it before hre is a little intro about it. Panna cotta is an Italian dessert made by simmering together cream, milk and sugar, mixing this with gelatin, and letting it cool until set. So, if you have never tried this elegant and creamy dessert go ahead and try it NOW and believe me you will be very pleased by yourselves for whipping up this easy dessert which requires only few ingredients.

pannacotta 2

STRAWBERRY PANNA COTTA

Ingredients :
250 grams fresh strawberries-pureed
300 ml fresh cream,
1/2 cup sugar and
2-3 tbsp of agar agar flakes / powder.

Method:
Strain the pureed strawberries and in a saucepan mix together the cream, sugar and the pureed strawberries. Cook this on low heat for 8-10 minutes and remove off the heat. Let it cool slightly. Meanwhile in another saucepan, cook the agar-agar in 2-3 tbsp of water until it dissolves completely. Add this to the cooked cream stirring constantly and mix well. Pour into cups or ramekins and refrigerate for 4-6 hours or overnight.

This can be eaten straight from the bowl in which it has been set or it can be inverted onto a plate and served topped with strawberry coulis.

pannacotta 3

STRAWBERRY COULIS

Ingredients:
200 grams of fresh strawberries,
3-4 tbsp of sugar and
1/2 tsp of lemon juice.

Method:
Blend starwberries in a blender(without adding any water). Add to a pan with the sugar and the lemon juice, bring to a boil and simmer for 4-5 minutes. Strain and let it cool completely. Spoon it on top of the Panna Cotta just before serving or you can top this sauce on the panna Cotta and let it set in the refrigerator till ready to serve.

Notes:
Gelatine is 'THE' ingredients that sets this dessert but as I don't use gelatine, I substituted it with agar agar(a seaweed), which is a vegetarian alternative to gelatine.
You can subtitute the strawberries with any other fruit of your choice like raspberries, black berries or mangoes. Or you can just make plain vanilla pannacotta by adding few drops of vanilla essence to the cream while cooking.


Tuesday, 12 April 2011

Blueberry Trifle


I am sure everyone is enjoying the beautiful and bright days of spring after the long grey winters. Spring is my favourite season of the year and I am sure its yours too. Thats because its a season of changes and it brings freshness to our lives and we see so many changes happening around us like the birds chirping happily, new leaves growing on the dry branches, beautiful beds of daffodils growing everywhere and also for me the most exciting part about this season is hosting parties and inviting friends for BBQ parties. We just had a BBQ day last weekend and I can't wait for the weather to get better so we can have more fun . And I love to end these parties with yummy and easy-peasy desserts. And this Blueberry trifle is one of my favourite spring/summer desserts. If you prepare the sauce ahead, its just a matter of assembling this.

Trifles are usually served in tranparant bowls/glasses to show the different layers in it. So make sure you are either using a big serving bowl or individual glasses for this. Traditionally alcohol is sprinkled on the layers of pound cake. But because we don't consume alcoholic drink, I have replaced it by making a vanilla syrup. So, go ahead and try this easy dessert and believe me you would be very pleased to see the pleasant smiles on your guest's face.


BLUEBERRY TRIFLE
Adapted from Joy of Baking
-serves 4

Ingredients:
8 slices of sponge cake/ pound cake,
3-4 tbsp vanilla syrup,
1 cup fresh Blueberries,
1 cup Blueberry sauce,
1 cup heavy whipping cream,
1/2 cup Mascarpone cheese,
1/2 tsp vanilla essence,
3 tbsp granulated sugar and
3-4 digestive cookies/ gingersnap cookies.

For Bleueberry sauce:
1-2 cups fresh Blueberries,
1/2 cup of sugar,
1 tbsp of cornstarch and
juice of half lemon.

For vanilla syrup:
1/2 cup of water,
2 tbsp of sugar and
1 tbsp of vanilla essence.


Method:

Using a cookie cutter cut the pound cake slices into 8 rounds according to the diameter of the glasses you are serving the trifle in. Now in a bowl, place the whipping cream, mascarpone cheese, sugar and vanilla essence and whip till soft peaks.

To make the blueberry sauce:
Combine all the ingredients listed above in a non stick saucepan and cook over a medium heat until the sugar melts, the blueberries break and cook till it reaches the consistency of a sauce. Cool in the refrigerator until ready to use.

To make the syrup:
Put all the ingredients- water, sugar and vanilla in a bowl and mix till well blended and keep aside.

To assemble:
Place 1 round slice of the pound cake at the bottom of the glass, sprinkle with 1 tsp of the vanilla syrup, And spread around 1 tbsp of the prepared blueberry sauce on the pound cake. Place some fresh Blueberries and place a dollop of whipped cream-mascarpone mixture. Now repeat another layer and refrigerate for 4-6 hours or till ready to serve. Just before serving sprinkle with some crushed cookies and top it with few fresh blueberries.

Note:
Refrigerating the Trifle will allow all the flavours to mingle and makes it more tasty. So its always better to prepare this dish in advance and store it in the refrigerator until ready to serve.

You can replace the blueberry sauce with any jam or fruit preserve. And also if you don't have whipped cream-mascarpone mixture, you can just use whipped cream or just plain old custard between the layers.

Thursday, 25 November 2010

Cherry and Blueberry Clafoutis


Have you ever noticed the difference in taste when you buy fruits from the supermarket and the ones that you buy from the Local farmer's market. If not.. than let me tell you that the local farmer's markets always sell fresh fruits grown locally .and organically and thus the taste is always much much better than the store bought fruits. Though they have short shelf life, I love the fresh taste of their fruits.

So, for me farmer's market is my favourite place for buying our fruits and veggies. We always make it a point to go there once in a week to buy fresh produce. And during one of my visits to the local farmer's market, I grabbed these juicy and fresh cherries.They were so sweet and tasty and not to forget about their freshness. And I had bought too many cherries that week, so I decided to make Clafoutis with them. Actually this post was looong due (more than 2 months) in summer ..but as I was not very active in my blog, I am posting this now.Anyways, its better now than never..right?

Clafoutis or clafouti pronounced kla-foo-TEE is a very famous baked French dessert made commonly with fresh cherries layered in a dish and covered by a thin batter. And served with generously dusted icing sugar.It is traditional to use the cherries with their pits as it is believed that the pits release a nice aroma to this delicious dessert.And here in this recipe, I have used the cherries with their pits. But, I know that many people out there would not like biting into the pit in their dessert. If you are among those, you can pit the cherries before baking.

CHERRY AND BLUEBERRY CLAFOUTIS

Ingredients:
400 grams of cherries
100 grams of Blueberries
1/2 cup all purpose flour
2 large eggs-lightly beaten
4-5 tbsp fine sugar
250 ml milk
50 grams unsalted butter-melted
1/2 tsp of vanilla extract and
Icing sugar for dusting

Method:
Pre-heat the oven to 180 C/350 F. Butter a shallow oven proof dish . Place the cherries and berries in the dish. In a bowl, mix the flour, milk, sugar, eggs , melted butter and vanilla extract until smooth and creamy. pour over the fruits and bake in the pre heated oven for 30-35 minutes or until a skewer inserted in the middle comes out clean. When warm, dust with icing sugar and serve warm with a scoop of vanilla ice cream or whipped cream or crème frâiche.

Notes:
Don't over beat the mixture. Just mix very lightly until well blended and smooth.
Like I said earlier, I have used the cherries with the pits. But one can pit them, before using for clafaoutis with a cherry pitter.
I had blueberries, so I just added them to this clafoutis. But you can entirely use cherries or with any other favourite fruit of yours.

This yummy French dessert is off to DK's event AWED hosted this month by Priya of Priya's easy N tasty Recipes and AWED is celebrating French cusine this month.

Monday, 21 June 2010

Baked Blueberry Cheesecake- with blueberry sauce

Creamy , yummy and gorgeous looking dessert- Yes !! I am talking about cheesecake. I am sure those have tasted cheesecake can never say 'No' to this tempting dessert. I fell in love with this dessert during my stay in New York State and let me tell you NY cheesecakes are very famous all around the globe. And if you are living in US you should definitely try cheesecakes from 'The Cheesecake Factory' atleast once.

My love for cheesecakes urged me to learn making this dessert at home..The first cheesecake I made was Strawberry cheesecake which I have earlier posted in my blog here. And this time, I baked a Blueberry cheesecake with home made Blueberry sauce. And I was so happy with the results, I just loved the gorgeous colour of the blueberry sauce on it and I was so happy that it was baked perfectly and didn't crack. And I am definitely going to bake this again and again.

BLUEBERRY CHEESECAKE

Ingredients:

For the base:
1 cup digestive biscuits-crumbs,
3 tbsp of melted butter,
1/4 tsp of cinnamon powder and
1/2 cup of sugar.
For the filling :
16 oz /approx 500 grams of cream cheese,4 large eggs,
16 oz sour cream,
1 1/4 cup sugar,
3 tbsp all purpose flour,
1 tsp vanilla extract and
1 tsp lemon zest.
For the sauce:
2-3 cups fresh Blueberries,1/2 cup of sugar,
1 tbsp of cornstarch and
juice of half lemon.
Method: Preheat the oven to 325° F / 162° C. In a bowl, mix all the ingredients for the crust and And press this mixture firmly into a round spring form baking pan. Press in very firmly using the back of a ladle or with a measuring cu(with flat surface). When, the crust is firmly pressed, refrigerate the pan till the filling is ready.

To make the filling- Beat the cream cheese in a bowl with a hand held mixer on medium speed until fluffy.Add the sugar and beat again for 1 minute. Add the eggs 1 at a time and beat on low speed after each addition . Add the sour cream, flour, vanilla essence and the zest and beat on low speed just till all the ingredients are well combined. Pour this mixture into the chilled crust and bake in the middle rack of the oven for 45-60 minutes or until firm, but little wobbly in the center. Remove from the oven and let it cool on a wire rack . Refrigerate for ateast 7-8 hours or overnight and just before serving top it with blueberry sauce or store bought blueberry pie filling.

For the sauce:
Combine all the ingredients listed above in a non stick saucepan and cook over a medium heat until the sugar is melted, the blueberries breaks and till it reaches the consistency of a sauce. Cool in the refrigerator until ready to use.


Notes:

Special care should be taken, to prevent the cheesecake from cracking. And the main reasons for the cheesecake cracks are over beating the ingredients or over baking. So, always make sure not to over-bake the cake.
If you like the the crust even on the sides, just double the quantity given above for the crust and press the mixture firmly and evenly on the sides.

Tuesday, 1 June 2010

Kiwi Ice Pops

Its Summer time here in UK..is it really? Its June already and still waiting for good and bright sunny days...like it should be during Summer. Last week was so bright and sunny and hot..the temperature raised till 28° C and when we were all so happy and excited to see those sunny days we had been waiting for..it lasted only for 3-4 days and now its rainy and the temeprature has gone down to 14°C :( People living in these European countries are blessed with only few counted weeks of summer.And we try our best to enjoy it and make the most of it. So, last week, when it was hot and sunny, I made these Kiwi ice pops. My kid loved these and has been asking me to make more. The green colour of these ice pops will definitely attract kids.


KIWI ICE POPS

Ingredients:
4 kiwi fruit,
1 cup sugar,
1 3/4 cup water,
1 kiwi-sliced and
juice of 1 lime.

Method:
In a saucepan, bring 1 cup of water and the sugar to boil and keep aside to cool. Peel the kiwi fruit, cut them into quarters and remove the white core and the black seeds from all the pieces. Now place the seeded kiwis in a food processor and puree the kiwis to a liquid. In a large bowl, combine the puree, the above sugar syrup, lime juice and the remaining 3/4 cup of water. Stir well and pour this mixture into molds and freeze until they begin to set. place a slice of Kiwi on the top and insert a stick and freeze again for 5-6 hours or overnight.
For easy unmolding, dip the molds briefly in hot water and holding the stick , pull out carefully.

Note:
If molds are not available, disposable plastic cups can also be used(as I did). Actually the paper cups are more convenient and its always easy to unmold from paper cups, than ice molds.

Wednesday, 5 May 2010

Kiwi smoothie

Last week I had bought lots of kiwis from the grocery store. And they had become ripe and I wanted to use them before they went bad. So, made this smoothie coz smoothies are simple and easy to make and the best way of tempting kids to consume fruits.KIWI SMOOTHIE

Ingredients:
2 ripe bananas,
2 kiwi,2 cups of cold milk and
2 tbsp of honey.
Method:Place all the ingredients into a food processor or blender and blitz until smooth and creamy.Serve chilled .

Note:
Sugar can also be used instead of honey.Tastes best when served chilled.Its award time again...I am very delighted to receive these bunch of award from my blogger friend Suhaina who blogs at My Singapore Kitchen... Thanks a ton Suhaina for these awards.


There is rule for these awards that we have to indicate 5 recipes which we like the most from our blogs. So, here it goes , my favourite 5.

First on my list comes Black Forest cake
Strawberry Cheesecake

Shakshouka

Sesame Naans

Achari gosht


Thursday, 15 April 2010

Double Orange Delight

This is really a delight for those who love yogurt. Easy to make and tastes yummy. Kids would love to have this anytime as their dessert :) speacially my kid who loves yogurt in any form :D And this Yogurt and orange delight is his favourite.
DOUBLE ORANGE DELIGHT

Ingredients:3-4 tbsp of non-fat Yogurt,
1 tbsp of Orange juice,1 large Orange,
50 grams of cocoa powder and
1 tbsp of butter
Method:
Mix Yogurt and Orange juice. cut the orange onto segments and and arrange on the yogurt mixture. Prepare Chocolate sauce with Cocoa powder , little water and butter. Pour the Chocolate sauce over the mixture. Serve chilled.

I want to thank my blog friends for the award they showered on me even in my absence..that is really soo sweet of them all...so, first comes an award from Prasu of FoodLovers. Thanks a lot Prasu for this lovely award :)
And hurray !!! Radhika Vasanth of Food for 7 stages of life has given me this award which she made exclusively for me - for being her 100th follower :D Thanks a ton Radhika.

LinkWithin

Related Posts with Thumbnails