Showing posts with label International desserts. Show all posts

Friday, 8 June 2012

Classic Victoria sandwich

DSC_0653

After living in UK from last 4 years, I have seen the love and respect people have for the royal family. And I was have witnessed the celebrations among locals here and have seen how everyone is very enthusiastic about the royal celebrations of the country. Last summer, it was the royal wedding of prince William and Kate and very shop here sold souvenirs of many kinds. Every shop had something special for the celebrations and even at schools the kids got to celebrate it by having a royal wedding tea party. My toddler stills recalls those celebration because he adores the prince and his wife and what more..he was lucky enough to even meet the Duchess of Cambridge at his school :)

429200_10150590252771593_1259591831_n
There he is lifting his hand and waving(second from left) Pic courtesy :BBC news

This Summer marked Queen Elizabeth II Diamond jubilee celebrations. The Diamond jubilee marked Queen Elizabeth's 60 years as queen and she is the second longest reigning monarch of United Kingdom after Queen Victoria. And it was so exciting to see people wear clothes that had red , blue and white, the street parties and the food with union jacks and crowns on it. It was a memorable event for everyone here and more for us because we will be leaving UK in couple of weeks. We will definitely miss this country and the lovely people we met here.

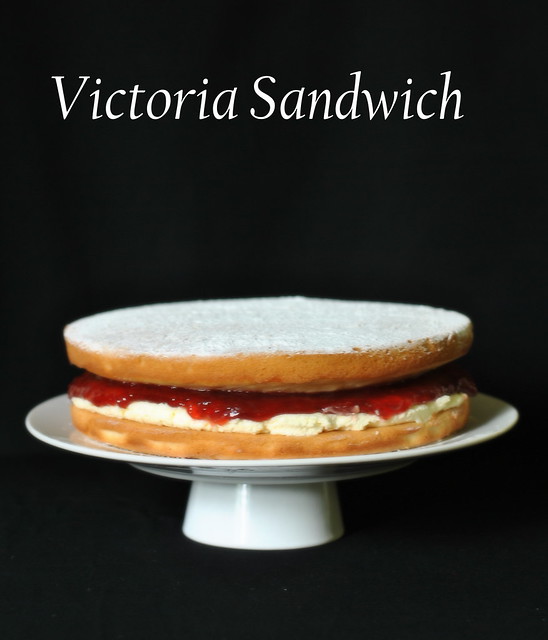
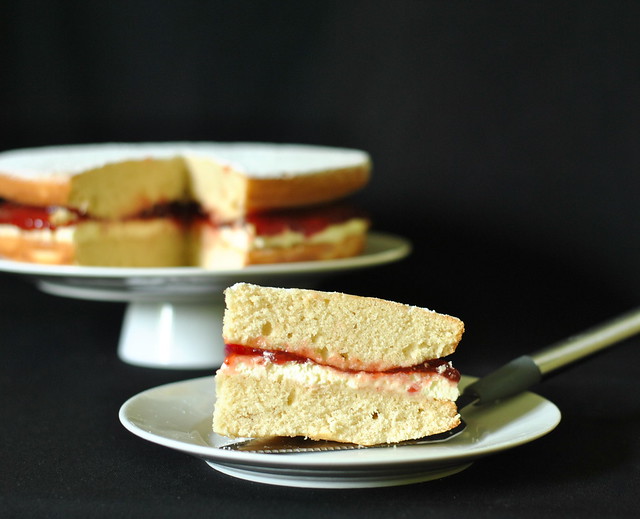
Coming to the recipe, I decided to bake the most iconic cake in Britain the 'Victoria sandwich' or 'Victoria sponge' which is named after Queen Victoria, which she loved having it with her afternoon tea. A classic Victoria sponge consists of jam and whipped cream or vanilla buttercream sandwiched between two sponges. Whenever I have bought this cake, I have found it containing the butter cream. Maybe because it will have a longer shelf life. But I opted for whipped cream filling as my son loved it. But I have also written the recipe for the vanilla cream.

DSC_0697

CLASSIC VICTORIA SANDWICH CAKE
Recipe source: BBC Good Food

Ingredients:

For the cake:
200 grams /1 1/2 cup self raising flour
200 grams /1 cup caster sugar
200 grams softened butter- at room temperature
4 eggs- beaten
2 tbsp milk
1 tsp baking powder

For filling:
200 ml double cream
300 grams strawberry jam
icing sugar for dusting.

Method:

Pre-heat oven to 190 C / 375 F. Butter 2 sandwich tins and line it with a nonstick baking paper. In a large bowl, beat the butter and sugar until light and fluffy. Now add the remaining ingredients and and beat till well incorporated and you get a smooth batter.

Divide the mixture equally between the prepared tins, smooth the surface with a spatula or the back of a spoon, then bake for about 20 minutes until golden and the cake springs back when pressed. Turn onto a cooling rack and leave to cool completely.

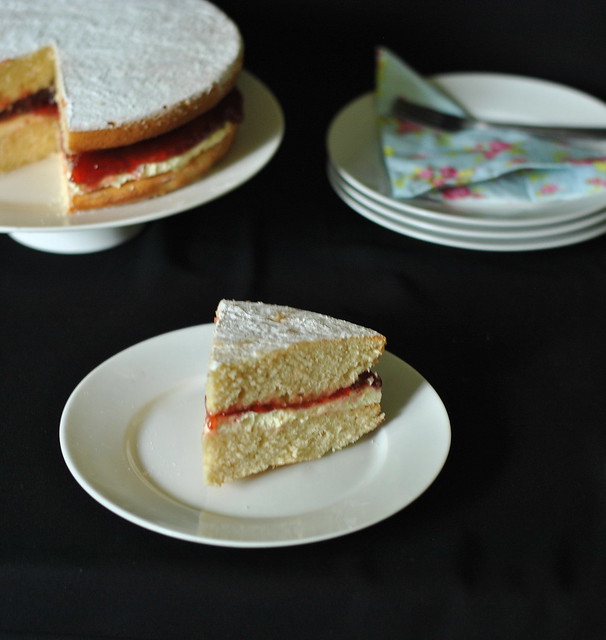
For the filling, whip the cream till soft peaks and spread it over the bottom of one of the sponges, top it with strawberry jam and sandwich the second sponge on top. Dust with a little icing sugar before serving.

DSC_0745

Notes:

If you don't have sandwich tin, you can bake it in any round cake tin and slice it into layers to add the filling.

There are many other options for the filling like you can replace the whipped cream with buttercream or lemon curd. And also you can replace the strawberry jam with raspberry jam. Below is the recipe for the buttercream filling.

For the butter cream filling :

Ingredients:
100g butter - softened
140g icing sugar - sifted
1 tsp vanilla extract

Method:
Beat the butter until smooth and creamy, then gradually beat in icing sugar and vanilla extract until you get a smooth cream.

Sending this celebration cake to Jagruti's event- Celebrate Diamond Jubilee.

Wednesday, 9 May 2012

Creamy Raspberry dessert (No cook / no bake)

Who doesn't love easy-peasy recipes..I absolutely love such recipe, which have less ingredients, is ready in a jiffy and tastes yummm. This is one such recipe, which needs just 3 ingredients and is a no bake/no cook recipe.And it will definitely flatter your guests. Had seen this recipe in one of baby magazines a long time back and just fell in love with this delicious dessert. So, let me keep it short and sweet just like this recipe and move on to the recipe.

<span class=


CREAMY RASPBERRY DESSERT

Ingredients:
80 grams of Cadbury's crunchie bar,
200 ml fresh double cream and
200 grams fresh raspberries

<span class=

Method:

With a rolling pin, bash the Crunchie chocolate bars into pieces with the wrappers still on. In a bowl, whip the cream with a hand whisk or with an electric beater until you have soft peaks. Open the crunchie packs and add to the whipped cream and stir to combine well.

Spoon into the serving glass or bowl and leave overnight in the fridge to allow the honeycomb in the chocolate to mix with the cream or atleast let rest in the refrigerator for 5-6 hours. And lastly, just before serving, top it with fresh Raspberry and serve. YUMMMMY !!

<span class=

Notes:

The crunchie chocolate bar is the main ingredient which blends withe the cream and gives a creamy, chocolaty taste. And as far as I know, its available in almost many countries. If you can't find it, you can replace it with any other chocolate bar containing honeycomb.

<span class=

Sending this over to Radhika's event 'Fruit recipes'.

More similar desserts:

Strawberry Pannacotta

Blueberry Trifle

Instant Eggless Chocolate Mousse

Tuesday, 4 October 2011

Strawberry Panna Cotta

Hi all,

Phew !!! Finally I managed to come back to my blog after a looooong gap of 4 months. The past few months had been very very hectic and busy with summer holidays and BBQ parties many friends and relatives visiting us and not to forget my Lil boy keeping me busy througout the day and as many bloggers out there must be aware of how hard it becomes to get back on to blogging if you stay away from it for a long period of time. I really really meant to get back to my blog every day but somehow kept procrastinating it day by day and week by week and I can't tell how much I missed blogging and all my blog friends here. But I am soo happy that I FINALLY managed to sit down and write a post today :)

pannacotta 1

Today I bring to you the famous Italian dessert Panna Cotta. Its a very creamy, yummy and a very easy dessert. I am sure most of you know about panna cotta. but if you have not heard of it before hre is a little intro about it. Panna cotta is an Italian dessert made by simmering together cream, milk and sugar, mixing this with gelatin, and letting it cool until set. So, if you have never tried this elegant and creamy dessert go ahead and try it NOW and believe me you will be very pleased by yourselves for whipping up this easy dessert which requires only few ingredients.

pannacotta 2

STRAWBERRY PANNA COTTA

Ingredients :
250 grams fresh strawberries-pureed
300 ml fresh cream,
1/2 cup sugar and
2-3 tbsp of agar agar flakes / powder.

Method:
Strain the pureed strawberries and in a saucepan mix together the cream, sugar and the pureed strawberries. Cook this on low heat for 8-10 minutes and remove off the heat. Let it cool slightly. Meanwhile in another saucepan, cook the agar-agar in 2-3 tbsp of water until it dissolves completely. Add this to the cooked cream stirring constantly and mix well. Pour into cups or ramekins and refrigerate for 4-6 hours or overnight.

This can be eaten straight from the bowl in which it has been set or it can be inverted onto a plate and served topped with strawberry coulis.

pannacotta 3

STRAWBERRY COULIS

Ingredients:
200 grams of fresh strawberries,
3-4 tbsp of sugar and
1/2 tsp of lemon juice.

Method:
Blend starwberries in a blender(without adding any water). Add to a pan with the sugar and the lemon juice, bring to a boil and simmer for 4-5 minutes. Strain and let it cool completely. Spoon it on top of the Panna Cotta just before serving or you can top this sauce on the panna Cotta and let it set in the refrigerator till ready to serve.

Notes:
Gelatine is 'THE' ingredients that sets this dessert but as I don't use gelatine, I substituted it with agar agar(a seaweed), which is a vegetarian alternative to gelatine.
You can subtitute the strawberries with any other fruit of your choice like raspberries, black berries or mangoes. Or you can just make plain vanilla pannacotta by adding few drops of vanilla essence to the cream while cooking.


Tuesday, 12 April 2011

Blueberry Trifle


I am sure everyone is enjoying the beautiful and bright days of spring after the long grey winters. Spring is my favourite season of the year and I am sure its yours too. Thats because its a season of changes and it brings freshness to our lives and we see so many changes happening around us like the birds chirping happily, new leaves growing on the dry branches, beautiful beds of daffodils growing everywhere and also for me the most exciting part about this season is hosting parties and inviting friends for BBQ parties. We just had a BBQ day last weekend and I can't wait for the weather to get better so we can have more fun . And I love to end these parties with yummy and easy-peasy desserts. And this Blueberry trifle is one of my favourite spring/summer desserts. If you prepare the sauce ahead, its just a matter of assembling this.

Trifles are usually served in tranparant bowls/glasses to show the different layers in it. So make sure you are either using a big serving bowl or individual glasses for this. Traditionally alcohol is sprinkled on the layers of pound cake. But because we don't consume alcoholic drink, I have replaced it by making a vanilla syrup. So, go ahead and try this easy dessert and believe me you would be very pleased to see the pleasant smiles on your guest's face.


BLUEBERRY TRIFLE
Adapted from Joy of Baking
-serves 4

Ingredients:
8 slices of sponge cake/ pound cake,
3-4 tbsp vanilla syrup,
1 cup fresh Blueberries,
1 cup Blueberry sauce,
1 cup heavy whipping cream,
1/2 cup Mascarpone cheese,
1/2 tsp vanilla essence,
3 tbsp granulated sugar and
3-4 digestive cookies/ gingersnap cookies.

For Bleueberry sauce:
1-2 cups fresh Blueberries,
1/2 cup of sugar,
1 tbsp of cornstarch and
juice of half lemon.

For vanilla syrup:
1/2 cup of water,
2 tbsp of sugar and
1 tbsp of vanilla essence.


Method:

Using a cookie cutter cut the pound cake slices into 8 rounds according to the diameter of the glasses you are serving the trifle in. Now in a bowl, place the whipping cream, mascarpone cheese, sugar and vanilla essence and whip till soft peaks.

To make the blueberry sauce:
Combine all the ingredients listed above in a non stick saucepan and cook over a medium heat until the sugar melts, the blueberries break and cook till it reaches the consistency of a sauce. Cool in the refrigerator until ready to use.

To make the syrup:
Put all the ingredients- water, sugar and vanilla in a bowl and mix till well blended and keep aside.

To assemble:
Place 1 round slice of the pound cake at the bottom of the glass, sprinkle with 1 tsp of the vanilla syrup, And spread around 1 tbsp of the prepared blueberry sauce on the pound cake. Place some fresh Blueberries and place a dollop of whipped cream-mascarpone mixture. Now repeat another layer and refrigerate for 4-6 hours or till ready to serve. Just before serving sprinkle with some crushed cookies and top it with few fresh blueberries.

Note:
Refrigerating the Trifle will allow all the flavours to mingle and makes it more tasty. So its always better to prepare this dish in advance and store it in the refrigerator until ready to serve.

You can replace the blueberry sauce with any jam or fruit preserve. And also if you don't have whipped cream-mascarpone mixture, you can just use whipped cream or just plain old custard between the layers.

Thursday, 25 November 2010

Cherry and Blueberry Clafoutis


Have you ever noticed the difference in taste when you buy fruits from the supermarket and the ones that you buy from the Local farmer's market. If not.. than let me tell you that the local farmer's markets always sell fresh fruits grown locally .and organically and thus the taste is always much much better than the store bought fruits. Though they have short shelf life, I love the fresh taste of their fruits.

So, for me farmer's market is my favourite place for buying our fruits and veggies. We always make it a point to go there once in a week to buy fresh produce. And during one of my visits to the local farmer's market, I grabbed these juicy and fresh cherries.They were so sweet and tasty and not to forget about their freshness. And I had bought too many cherries that week, so I decided to make Clafoutis with them. Actually this post was looong due (more than 2 months) in summer ..but as I was not very active in my blog, I am posting this now.Anyways, its better now than never..right?

Clafoutis or clafouti pronounced kla-foo-TEE is a very famous baked French dessert made commonly with fresh cherries layered in a dish and covered by a thin batter. And served with generously dusted icing sugar.It is traditional to use the cherries with their pits as it is believed that the pits release a nice aroma to this delicious dessert.And here in this recipe, I have used the cherries with their pits. But, I know that many people out there would not like biting into the pit in their dessert. If you are among those, you can pit the cherries before baking.

CHERRY AND BLUEBERRY CLAFOUTIS

Ingredients:
400 grams of cherries
100 grams of Blueberries
1/2 cup all purpose flour
2 large eggs-lightly beaten
4-5 tbsp fine sugar
250 ml milk
50 grams unsalted butter-melted
1/2 tsp of vanilla extract and
Icing sugar for dusting

Method:
Pre-heat the oven to 180 C/350 F. Butter a shallow oven proof dish . Place the cherries and berries in the dish. In a bowl, mix the flour, milk, sugar, eggs , melted butter and vanilla extract until smooth and creamy. pour over the fruits and bake in the pre heated oven for 30-35 minutes or until a skewer inserted in the middle comes out clean. When warm, dust with icing sugar and serve warm with a scoop of vanilla ice cream or whipped cream or crème frâiche.

Notes:
Don't over beat the mixture. Just mix very lightly until well blended and smooth.
Like I said earlier, I have used the cherries with the pits. But one can pit them, before using for clafaoutis with a cherry pitter.
I had blueberries, so I just added them to this clafoutis. But you can entirely use cherries or with any other favourite fruit of yours.

This yummy French dessert is off to DK's event AWED hosted this month by Priya of Priya's easy N tasty Recipes and AWED is celebrating French cusine this month.

Monday, 8 November 2010

Instant Eggless Chocolate Mousse

Back with yet another punch, seems like just few days back I posted Molten Lava Cake and here comes another choclatey post - an instant and eggless Chocolate Mousse.Yes !! Instant Chocolate Mousse... coz it tastes only 1 hour to set unlike the version with eggs , whick takes atleast 7-8 hours to set.

This month we were given 3 recipes to choose from..One of them was this easy peasy Eggless mousse and there other options were Chocolate mousse(with Eggs) and a Savoury Tomato Souffle. I chose to make this recipe and also tried my hands at Tomato Souffle (wil post it next).

Now this recipe need only 5 ingredients and the main ingredient that helps this mousse set is Marshmallows. As marshmallows contain gelatin, I had a hard time searching for Halal Marshmallows...but finally found them in an asian store and was soo happy to try this eggless version of mousse which I had bookmarked loooong back from Nigella Lawson's website.

EGGLESS INSTANT CHOCOLATE MOUSSE
Recipe Souce :Nigella Lawson

Ingredients:

150 gms Mini marshamallows (you can use regular marshmallows too)
50 gms Butter- softened
250 gms Chocolate( preferably dark Chocolate)-chopped into small pieces
60 ml Hot water
284 ml Cream and
1 tsp Vanilla extract

Method:

In a heavy-bottom saucepan, melt the marshmallows,butter,chocolate and water together, stirring every now and then, till evrything melts to form a smooth sauce. Let the Chocolate cool while you are whipping the cream. Meanwhile, whip the cream with vanilla until thick (firm peaks).

Fold the whipped cream into the cooling chocolate mixture until you have a smooth mixture. Pour or pipe into individual ramekins or glasses and let it set in the fridge for about 1 hour. Serve with whipped cream and or with strawberry / raspberry. Or just sprinkle some grated white chocolate :)


Verdict:

A smooth and divine Mousse which you will definitely fall in love with. We just loved indulging ourselves in this dessert . And this is a very easy and eye-catching dessert for any party. So do try it and see for yourselves :)


Thursday, 7 October 2010

Molten Lava Cake

FINALLY !! Finally, I managed to come back to blogging after exactly 3 months of break. Its been exactly 3 months, since I last posted on my blog. And my last post was something Chocolatey and here I am back with yet another irresistible choccolate cake recipe. This cake was baked for Sweetpunch-October, chosen by Divya Kudua.

The cake was sooo yummy with the gooey chocolate sauce flowing out from the soft chocolate cake. And I must say this is the easiest cake I have ever made, preparing the bater takes just few mintes and baking this delicious cake takes only 10 -11 minutes. And Voila !! your Molten Lava cake is ready in less than 30 minutes. And make sure you eat these, when they are still hot or atleast warm to enjoy the hot chcolate sauce oozing from the cake like lava :)


MOLTEN LAVA CAKE
-serves 4
Recipe source - showmethecurry.com

Ingredients:
4 oz (113g) Semi-Sweet Baking Chocolate,
4 oz (113g) Butter,
2 Eggs,
1/3 cup (75 g) Sugar,
1/4 cup (40g) All purpose Flour,
Butter – for greasing ramekins


Method:
1. In a double boiler, melt chocolate.
2. In a medium mixing bowl, beat Eggs and Sugar until light and fluffy.
3. Once chocolate is melted, remove pan from heat and add in butter. Mix until the butter melts fully.
4. Add chocolate/butter mixture into the eggs, add all-purpose flour and mix until well incorporated.
5. Butter bottom and sides of ramekins (small glass/porcelain bowls) and pour in mixture about 3/4 way full.
6. Place ramekins on a baking tray and bake at 350 degrees Fahrenheit (180 C) for 10 – 15 minutes. Shorter for gooey (molten) inside, longer for stiff inside.
7. Serve hot with vanilla ice cream or with a dusting of powdered sugar.

Notes:

The above recipe makes 4 medium sized ramekins.The cake is done, when the sides of the cake looks cooked, but the centre is still wobbly. Baking it longer(cooking completely) will make the inside stiff. So, keep a close eye to make sure you don't over-cook them.

Wednesday, 7 July 2010

Devil's Food Cupcakes with Vanilla Cream filling

The second recipe from' A Sweet Punch' was these Cupcakes. And these are the first ever cupcakes I have baked...the only time I had used my cupcake pan was to bake these Portuguese Custard tarts. Never had I thought that I would be using it to make cupcakes , but here I am with the cupcakes and I thank Divya of Easycooking for this months Challenge through which I had a very new baking experience.

I enjoyed making these cuppie cakes and when I bake this next time, the only change I want to make is to not use the wrappers for them, coz I think they will look more cute without the wrappers as these are filled cupcakes. And I didn't use the Chocolate butter cream frosting. Instead I just used my family favourite Nutella as frosting. The recipe given below yields 24 cupcakes and if you want you can halve the recipe for 12 cupcakes...but As there were some lil guests at my House I knew they would all be gone in a day. So, made 24 of these and the verdict was that they all vanished the same day coz they were so moist and yummy.


DEVIL'S FOOD CUPCAKES WITH VANILLA CREAM FILLING
Recipe source - Baking bites

Ingredients
1/2 cup butter- room temperature
2 cups sugar
3 large eggs
3/4 cup sour cream (low fat or full) -can be substituted with yogurt or cream mixed with a tsp of yogurt
1 tsp vanilla extract
2 cups all purpose flour
2 tsp baking soda
1/2 tsp salt
1/4 cup cocoa powder
2-oz dark chocolate
1 cup water, boiling


Method :
Preheat the oven to 350F and lightly grease two 12-cup muffin tins.
In a large bowl, cream together butter and sugar until light.Beat in eggs one at a time, followed by sour cream and vanilla extract.
In a small bowl, whisk together flour, baking soda and salt.
Add half of flour mixture to the butter mixture, followed by the sour cream and vanilla extract, followed by the addition of the rest of the flour mix.
Stir well between each addition and mix until no streaks of flour remain.Stir the cocoa powder and the dark chocolate into the boiling water in a large measuring cup.
Pour chocolate water into the rest of the batter and stir until uniform.Evenly distribute batter into prepared baking cups. Bake for 13-15 minutes, until a tester comes out clean and the cakes spring back when lightly pressed. (It’s fine if you can’t fit both trays into the oven at the same time, just wait until one batch finishes before putting in the second pan)
Turn cupcakes out onto a wire rack to cool completely before frosting and filling.


Vanilla Cream Filling
3 tbsp all purpose flour
1/2 cup milk (low fat is fine)
1/2 cup butter (or trans fat-free shortening)
1/2 cup granulated sugar
1/2 scraped vanilla bean or 1 tsp vanilla extract

Method:
Whisk together the flour and milk and cook in a small saucepan over medium heat until thick. This will only take a few minutes.
Stir continuously to prevent the mixture from clumping and do not bring all the way to a boil.
When thickened (consistency will be that of a thin pudding or custard), strain with a mesh strainer into a small bowl, cover with plastic wrap and let cool completely to room temperature.
When the milk mixture is cool, cream the butter (or shortening) and sugar together in a medium bowl until light. Add in the milk/flour mixture and the scraped vanilla bean seeds (or vanilla extract) and beat at high speed with an electric mixer for 7 minutes, until light and fluffy.
Scrape into a pastry bag fitted with a plain tip, or a large zip-lock bag with the corner cut off, and set aside until ready to fill your cupcakes.

Chocolate Buttercream Frosting
1/2 cup butter, room temperature
1/2 cup unsweetened cocoa powder
2-3 cups powdered sugar
1/4 cup milk1 tsp vanilla extract

Method:
Combine all ingredients in a large bowl and beat, with an electric mixer, until frosting is creamy, 3-5 minutes. Add additional powdered sugar as needed to achieve a thick, but not stiff, frosting that is easy to spread. Add additional milk, if necessary, to thin the frosting if it gets too thick.


Assembly
(A photo how-to of the assembly method can be found here.) Take a cooled cupcake and, using a small pairing knife, cut a cone of cake (1-inch across by 1-inch deep) out of the top. Trim off the pointy end of the cone, leaving a flat circle of cake. Set aside and repeat this process for all the cupcakes.Take the cream filling and squeeze a tablespoon or so into each cupcake cavity, filling the hole up to the top with filling. Top off with a flat circle of cake to plug the hole and keep the filling in place.
Using a butter knife or a small offset spatula, frost each cupcake with a layer of chocolate butter cream frosting. Place a dollop of icing in the center of the cupcake (on top of the cut out circle of cake) and spread from the center to the sides of the cupcake.If you have leftover filling, transfer it to a fresh Ziploc bag and cut a very small opening in one corner. Pipe a swirly line down the center of each cupcake, like the cupcakes in the pic here .
Store in an airtight container until ready to serve.


Note:
The frosting can be skipped completely and can be served with with some sugar dusted on the top. These soft and most cupcakes taste yummy, even without any frosting.

Monday, 7 June 2010

Tiramisu Cake

Like many other bloggers out there, even I have a dream to join The Daring Kitchen someday..But, I feel I still need to learn a lot about baking, before I can join or atleast come close to those amazing and expert bakers. So, when I heard about Sweet punch , which was started to teach Novice bakers like me about baking...I knew that this group is for me :) And I am sure, I will love baking yummy goodies every month.

'A Sweet punch' is a new baking group started by Ria, Divya and Maria. This group is for all those people out there who are still learning to bake (like me) and Sweet Punch is for all those whose have a passion for baking because the mission of this group is to make baking easy for EVERYONE. And thus, our first baking challenge by Ria of Ria's collection was to bake this Tiramisu cake.

Tiramisu- I am sure everyone one knows about this famous Italian dessert. Traditionally Tiramisu is made using savoiardi (lady finger biscuit), which are dipped in coffee or rum and then layered with mascarpone cheese and whipping cream mixture and then, dusted with cocoa powder. And this Tiramisu cake is easy to bake and assemble and tastes Yummmmm.

Though I had never tasted this dessert before, I had heard a lottt about this dessert and I always wanted to make this at home. And Now,I have just fallen in love with this dessert and I am definitely going to try this again and again. TIRAMISU CAKE
For the cake layers:
2 cups cake flour,
2 teaspoons baking powder,
1/8 teaspoon baking soda,
1/4 teaspoon salt,
1 1/4 sticks/10 tablespoons unsalted butter(room temperature),
1 cup sugar,
3 large eggs,
1 large egg yolk,
1 1/2 teaspoons pure vanilla extract and
3/4 cup buttermilk

For the espresso extract:

2 tablespoons instant espresso powder
2 tablespoons boiling water.

For the espresso syrup:
1/2 cup water
1/3 cup sugar

For the filling and frosting:
1 8-ounce container mascarpone,
1/2 cup confectioners’ sugar- sifted,
1 1/2 teaspoons pure vanilla extract
1 cup cold heavy cream
2 1/2 ounces bittersweet or semisweet chocolate, finely chopped, or about 1/2 cup store-bought mini chocolate chips,
Chocolate-covered espresso beans, for decoration (optional)
Cocoa powder, for dusting

Getting ready:
Center a rack in the oven and preheat the oven to 350 degrees F. Butter two 9×2 inch round cake pans, dust the insides with flour, tap out the excess, and line the bottoms of the pans with parchment or wax paper. Put the pans on a baking sheet.

To make the cake:

Sift together the cake flour, baking powder, baking soda, and salt.

Working with a stand mixer, preferably fitted with a paddle attachment, or with a hand mixer in a large bowl, beat the butter on medium speed until soft and creamy.

Add the sugar and beat for another 3 minutes. Add the eggs one by one, and then the yolk, beating for 1 minute after each addition. Beat in the vanilla; don’t be concerned if the mixture looks curdled. Reduce the mixer speed to low and add the dry ingredients alternately with the buttermilk, adding the dry ingredients in 3 additions and the milk in 2 (begin and end with the dry ingredients); scrape down the sides of the bowl as needed and mix only until the ingredients disappear into the batter. Divide the batter evenly between the two pans and smooth the tops with a rubber spatula.

Bake for 28 to 30 minutes, rotating the pans at the midway point. When fully baked, the cakes will be golden and springy to the touch and a thin knife inserted into the centers will come out clean. Transfer the cakes to a rack and cool for about 5 minutes, then run a knife around the sides of the cakes, unmold them, and peel off the paper liners. Invert and cool to room temperature right-side up.

To make the extract:
Stir the espresso powder and boiling water together in a small cup until blended. Set aside.

To make the syrup:
Stir the water and sugar together in a small saucepan and bring just to a boil. Pour the syrup into a small heatproof bowl and stir in 1 tablespoon of the espresso extract and set aside.

To make the filling and frosting:
Put the mascarpone, sugar, vanilla, and liqueur in a large bowl and whisk just until blended and smooth.

Working with the stand mixer with the whisk attachment or with a hand mixer, whip the heavy cream until it holds firm peaks. Switch to a rubber spatula and stir about one quarter of the whipped cream into the mascarpone. Fold in the rest of the whipped cream with a light touch.

To assemble the cake:
If the tops of the cake layers have crowned, use a long serrated knife and a gentle sawing motion to even them. Place one layer right-side up on a cardboard round or a cake plate protected with strips of wax or parchment paper. Using a pastry brush or a small spoon, soak the layer with about one third of the espresso syrup. Smooth some of the mascarpone cream over the layer – user about 1 1/4 cups – and gently press the chopped chocolate into the filling. Put the second cake layer on the counter and soak the top of it with half the remaining espresso syrup, then turn the layer over and position it, soaked side down, over the filling. Soak the top of the cake with the remaining syrup.

For the frosting- whisk 1 to 1 1/2 tablespoons of the remaining espresso extract into the remaining mascarpone filling. Taste the frosting as you go to decide how much extract you want to add. If the frosting looks as if it might be a little too soft to spread over the cake, press a piece of plastic wrap against its surface and refrigerate it for 15 minutes or so. Refrigerate the cake too.With a long metal icing spatula, smooth the frosting around the sides of the cake and over the top. If you want to decorate the cake with chocolate-covered espresso beans, press them into the filling, making concentric circles of beans or just putting some beans in the center of the cake.

Refrigerate the cake for at least 3 hours (or for up to 1 day) before serving – the elements need time to meld.Just before serving, dust the top of the cake with cocoa.

Notes:
The cake can be cut into small rounds and can be made as cakelettes or you can assemble them in a glass for individual servings.
I didn't use the whole syrup to moisten the cake, thinking it would become soggy. But I think the quantity given above should have been used to make the cake more moist.
And I have skipped using Kahlua or brandy for the extract and the syrup for obvious reason.
And as I didn't get chocolate covered express bean, I used choco chips to decorate.

Wednesday, 10 February 2010

Classic Carrot Cake / My blog turns 1

YES!!!I am soo soo excited to say that my blog has turned 1 year old today... it all started when I started taking food photos of the new recipes I tried to show it to my mom, who lives far away from me. And then, one fine day my husband suggested that I should start a blog, to store all the food snaps with the recipes, which would make it easier for me to refer in future and thus my blog 'Faiza Ali's Kitchen' was born.Firstly I want to thank my husband for introducing me to this blogging world and helping me through it. And my sincere thanks my Mom and Mom-In-Law from whom, I have learned most of my cooking. And Also I would like to thank Lubna baaji of Yummy Food for taking out her precious time for helping me to create a menu bar for my blog..Thanks a lot dear.
Through blogging I made so many friends from around the globe, who visit my blog regularly and encourage me with their kind and lovely comments. I had never imagined in my wildest dreams that in 1 year I will have 135 readers/ followers. I am really thankful to all my fellow bloggers and friends who encourage me, it is the love and kindness you all shower on my blog that keeps it going. Thank you friends :-)
Now coming to today's recipe, I baked this classic carrot cake, which I learned from the book ''cakes and cake decorating ''. Last month my fellow blogger and friend Shabs of Shab's Cuisine had mailed to inform me that there is a huge sale on recipe books at WHSmith. I went to the store the very next day to grab some recipe books. And among the books, that I bought was this book''Cakes and cake decorating'' by Angela Nilson, Sarah Maxwell and Janice Murfitt. I never get tied of looking at those lovely cakes in my book everyday :D it has 200 recipes for beautiful cakes and the best part is the price I bought the book for. The original price of this book is £14.99 and I payed only £ 3.50 for this brand new book which was on a sale(smiles).
There are so many beautiful cakes to bake in this book, but I decided to start with a simple carrot cake and I decorated it with cute lil carrots made using the marzipan.And Yes, this is the first time, I was trying my hands on marzipan. And Voila !!1 here are the results. So, without further ado here is the recipe for the carrot cake.
CLASSIC CARROT CAKE

Ingredients:
225 grams / 1 cup of caster sugar,
20 ml /1 scant cup of vegetable oil,
225 grams / 2 cups of self-rising wholemeal flour,
1 tsp ground cinnamon,
1/2 tsp ground nutmeg,1 cup ground walnuts,
grated zest and juice of 1 orange,
3-4 finely grated carrot- squeezed dry,
4 eggs and
1/2 tsp of salt

For the Frosting:
225 grams / 1 cup of cream cheese,
30 ml /2 tbsp of clear honey,1 tbsp of orange juice,
50 grams of marzipan,
orange food colouring,
angel hair spaghetti and
green food colouring.
Method:
Pre-heat the oven to 180 Celsius / 350 Fahrenheit. Grease a 8 inch round cake tin, line the base with greaseproof paper and grease the paper. Beat the sugar, eggs, oil, orange zest and orange juice together until light and frothy. Sift the dry ingredients- flour, salt and spices in another bowl and add to the frothy egg mixture and beat for a further minute. Stir in the carrots and the groud walnuts and spon the mixture into the prepared tin. bake for 50-60 minutes or until risen and a toothpick or a skewer inserted into the centre of the cake comes out clean.
Meanwhile make the icing. to make the icing, beat the cheese, honey and 1 tbsp of orange juice together until smooth. Chill for 30 minutes to firm up.Break the angel hair spaghetti into 2 1 inch pieces and soak in green food colouring for 5-10 minutes. dry them on a paper towel until ready to use.Tint the marzipan with orange food colouring to resemble the colour of carrots. Break small pieces and roll between your palms to form small carrot shapes.using a small knife, press marks around the sides and stick 2 small pieces if the spaghetti in the top of each one to resemble the stalks.
Spread the icing over the top of the cooled cake. Arrange the carrots around the cake or in a bunch, in the centre of the cake.


Note:This cake can be served with a simple dusting of icing sugar on the top if one doesn't like like cream cheese icing. Also the recipe asked for Angelica as stalk for the carrot, which i could find here, So, i used the spaghetti as stalk.

Wednesday, 13 January 2010

Pasteis de Nata / Portuguese custard tarts

Pasteis de nata are traditional Portuguese custard tarts. They are also known as pastel de nata. To know more about these delicious beauties , read here. I found them very easy to prepare and very yummy. My 2 1/2 year old son didn't even wait till they cooled :) he gobbled some tarts, even before I could take any pics. I was left with only few tarts to take the pic. Believe me, when I say they were yummilicious and I bet, no one can stop at only 1 tart :)

PASTEIS DE NATA / PORTUGUESE CUSTARD TARTS

Ingredients:
1 package of puff pastry sheets,
4 egg yolks,
1 1/2 cups of whole milk,
1 tsp of vanilla essence
3-4 tbsp cornstarch/cornflour,
1/2 cup of sugar,
1 tbsp of orange rind and
a pinch of nutmeg powder.

Method:
Thaw the puff pastry sheets. Heat the oven to 170º C. To make the custard- Put the milk in a sauce pan and heat it on a low flame. Whisk the egg yolks with sugar and vanilla essence till the sugar is well blended with the milk. In another bowl, take some cold milk and add the corn starch to it and mix until there are no lumps in it, keep aside. Slowly add the egg yolks and sugar to the milk and stir it...make sure to boil the milk on low flame. When it starts boiling, add the cornstarch mix to the milk slowly, away from the heat and stirring it with the other hand. Now return the pan back to the flame and cook on low heat till the custard thickens. remove from heat and cool completely.
Lightly grease the muffin cups. Roll the puff pastry sheet and using a cookie cutter, cut circles big enough to cover the bottom and sides of the muffin cups. gentle place each circle into the muffin cups and press on all the sides and make sure there are no air pockets. Pour the prepared custard into the shells and bake for 20-30 minutes or until you the shells and the filling is lightly brown on the top.
Serve it warm or after it cools with a cup of hot tea / coffee or as a quick and yummy dessert after the dinner. Enjoy !

Note: You can even bake the puff pastry shells for 8-10 minutes, before pouring the custard to ensure that the pastry is not uncooked. If doing so, line the puff pastry in the cups with parchment paper and put some raw(dry) baking beans or some rice in to parchment paper to prevent the puff pastry from rising. Remove the beans/ rice and the parchment paper and fill with the prepared custard and bake as mentioned above.

Recipe adapted from allrecipes.com

I am sending this to AWED- Potuguese hosted this month by Priya of Priya's Easy and tasty recipes and event started by DK of Chef In You.

Tuesday, 5 January 2010

Black Forest Gateau / black forest cake

I wish all my blogger friends a very very happy and prosperous NEW YEAR 2010..I know...I know..I am wishing very late, but I was very busy for the past 1 week and so, this is my first post of 2010.....Black forest cake..yummmm...it reminds me of my childhood days in India...it was my favourite cake for years, then one day when I came to know that rum/brandy is added to the black forest cake, I stopped buying it from the bakeries, because we don't consume alcoholic drinks or anything with alcoholic drinks. But I always missed eating my fav fav cake :( And I never knew anything about baking then. I came across this recipe which one of my friend had . And I baked my favourite cake at home, without any rum/ brandy and YES, black forest cake is the first cake I learned to bake or should I say this is the only cake I know to bake :) I baked this cake again few weeks back after a long long time (after coming to UK). So, here goes the recipe for my favourite black forest cake...

BLACK FOREST GATEAU / BLACK FOREST CAKE

Ingredients :

For the cake:
1 3/4 cups flour,
3/4 cup of unsweetened cocoa powder,
1 1/2 cup of sugar,
6 eggs,
1 tsp of baking powder,
1 tsp of vanilla essence,
1/2 cup of butter/vegetable oil and
1 pinch of salt,
For the filling/topping:
1 tin of maraschino cherries,
3-4 tbsp of powdered sugar and
3-4 cups of heavy whipping cream.
For the syrup
1 cup of water,
1/2 cup of sugar and
1 tsp of vanilla essence.
For garnishing:
chocolate curls and
whole cherries.

Method:
Pre-heat the oven to 180 C/ 350 F . Grease and flour a 9" inch round pan. In a bowl mix the dry ingredients- flour, salt, baking powder and cocoa powder and sift this, so that everything gets mixed well and to avoid lumps. Now add the sugar, vanilla essence, melted butter/oil and the eggs to this bowl with dry ingredients and beat until well blended OR the other method is to beat the eggs separately with sugar and essence till fluffy and fold in the dry mixture with the eggs. Pour this mixture into the prepared pan. Bake for 30-35 minutes or until a toothpick or a knife inserted in the center comes out clean. let the cake cool in the pan for 10-15 minutes. now remove the cake from the pan and allow to cool completely on a wire rack.
For the syrup: Boil the water with the sugar in a saucepan for few minutes. the syrup should neither be sticky nor water. Remove from fire, cool it and add the vanilla essence. Cool completely before using it.
Whip the cream and the sugar with an electric mixer until you get soft peaks. Drain the juice from the cherries and preserve 3-4 tbsp for the syrup.Preserve some whole cherries for garnishing on the top and chop the remaining cherries to small pieces.
Now to assemble the cake. Cut the cake horizontally with a serrated knife into 2/3 layers. On the first layer, sprinkle some of the above syrup to moisten the cake. Now spread a layer of the whipped cream and sprinkle the chopped cherries on the whipped cream.Now place the second layer and repeat the same procedure. place the last slice of cake and frost the cake completely with whipped cream on the top and the sides. Garnish with some chocolate shavings/ chocolate sprinkles/ chocolate curls and with whole cherries.
Refrigerate for 3-4 hours before serving.


Sending this Black Forest Gateau to:
In Love with Delectable Desserts, Pastries and Ice creams hosted by Radhika Vasanth of Food for 7 stages of life and Sudeshna of Cook like a Bong
Show me your cake event hosted by Divya of Dil Se .

Tuesday, 1 December 2009

Walima cooking club (November) Lebanese cuisine- Aysh-el saraya and Sheesh barak

For the month of November Walima Cooking Club chose Lebanese cusine. As usual were given 1 sweet dish 'The Bread of the Seraglio' ( Aysh el-Saraya) picked by Joumana of Taste of Beirut
and 1 savory dish Sheesh Barak picked by Arlette of Phoenician Gourmet. Every month I try only 1 delight...either sweet or savory. But, I was soo tempted to try both the yummy delights this month. Thanks Joumana and Arlette.I enjoyed making both the dishes, they turned out really yummy. Here is a little introduction to Lebanese cuisine.

Lebnan, Le-b-nan that means the White Mountain, once called "The pearl of the middle East,” is bordered by the Mediterranean Sea, Israel, and Syria. At one time or another Phoenicians, Assyrians, Babylonians, Persians, Greeks, Arabs, European Crusaders, Ottomans, and French all ruled and had influence over the land and its cuisine. The Cuisine of this Ancient Land is diverse and steeped in history; Lebanon is a culinary and cultural Crossroads. Lebanon is located on the Eastern most shore of the Mediterranean in the Fertile Crescent, where Western Civilization is said to have begun. Both the Eastern and Western influences in its cookery are apparent. It combines the sophistication of European Cuisine with the excitement of Eastern Spices. The food of the entire Mediterranean region is a celebration of life; it is fresh, flavorful, diverse and invigorating. The Lebanese proudly admit that the genius of their food is its simplicity, and that the food was a product of both the earth and the sea. Also the natural bond that all of the Mediterranean cuisines share, from the tip of Spain to Lebanon “the same waters equally splash all of the countries around the Mediterranean". Lebanese cuisine is the richer and the finest in the Middle East and any other Arab countries due to their milder climate, and indeed, any cuisine is dependent upon climate and geography. Lebanese Cuisine is considered a very balanced, healthy diet. The Cuisine of Lebanon is the epitome of the Mediterranean diet. The country’s cuisine characterized by the use of a wide variety of fresh ingredients which include olive oil, herbs, spices, fresh fruits and vegetables, dairy products, grains, fresh fish and seafood; animal fats are consumed sparingly. Poultry and red meat and usually lamb, is eaten more often, either grilled, baked or sautéed in olive oil or butter, cream is rarely used other than in a few desserts. Vegetables are often eaten raw or pickled as well as cooked. Though its mainstream popularity is relatively new, the Cuisine is not; the Cuisine of Lebanon has been in the making since pre-biblical times. The influence that Lebanon has had on the world is totally out of proportion to its size; culinary contributions from this tiny Country have had the greatest impact on modern Middle Eastern cuisine.

THE BREAD OF THE SERAGLIO( Aysh-el-saraya)

Ingredients:
1 loaf white bread,
2 cups of golden super fine sugar,
1 cup of water,
4 tablespoons water,
1 teaspoon lemon juice,
1 tbsp orange blossom water or rose water,
1 1/2 cups Lebanese clotted cream or Ashta ,
1 cup coarsely ground pistachios.

Method:
Cut the crust with a sharp knife and keep aside.Arrange the slices on a baking sheet and toast in an oven at 350 F until lightly brown on both sides(Turn once) about 10-15 minutes.Cool and break into small pieces .
To make the caramelized syrup, in a saucepan, put water, sugar and lemon juice and bring to boil stirring continuously, so that the sugar does not crystallize in places, for about 20 minutes or until it is caramelized.
Towards the end of the cooking time, measure 7 ounces of water and bring to a boil in a teakettle. When the sugar is caramelized, start adding the water gradually without taking the sugar mixture off the heat.
Now add the bread pieces to the pan. Stir for 3-5 minutes until the breads absorbs the sugar syrup and becomes soft. Add the orange blossom water and remove from heat.
Pour the mixture in a serving dish and spread it evenly across the dish. After it cools spread the Ashta cream / ricotta cheese evenly on the bread and garnish with the coarsely grounded pistachios.

Note: If one can't find ricotta cheese/ Ashta cream, here is a way to make home made Ashta :-
Clotted cream or Ashta: 2 slices of white bread without the crust
2 cups half-and-half
Cut the bread in small pieces and place in a saucepan
Pour the cream or half-and-half over the bread
Bring to the boil. Lower the heat and simmer 10 minutes, stirring often.
Cool then refrigerate.

Source: Lebanese Cuisine by Anissa Helou and Middle eastern cookbook by Maria khalife.

SHEESH BARAK

Ingredients:

For the basic dough or Ajeen :
1/2 kg (2-3 cups) plain flour,
1 cups warm water,
1/4 cup olive oil,
1/4 cup vegetable oil,
1 tbsp salt and
1 tbsp sugar.

For the filling:
1/2 kg minced meat( beef or lamb),
3 medium sized onions finely chopped,
1/4 tsp ground all spice,
1/4 tsp cinnamon powder,
1/4 cup of pine nuts and
2 tbsp cooking oil or butter.

For the yogurt sauce:
1/2kg of plain Greek Style Yogurt,
1 tbsp cornstarch,
1/2 tsp of salt,
1/4 cup water,
1 beaten egg ,
1/2 cup finely chopped fresh mint or some dried mint,
2-3 cloves of crushed garlic.

Method:
For the basic dough or Ajeen:
Sift the flour into a working surface.Mix in salt and sugar. Make a well in the center.Pour olive oil and vegetable oil in the well.Mix the dry ingredients into the liquid.Add water gradually. Knead the dough into a ball. Knead the dough on a floured working surface until it is smooth and elastic.Form the dough into a ball and put into a lightly floured bowl, covered with a damp cloth.
Leave in a warm place until the dough has doubled in size.

For them meat filling:
Fry onion in butter till color changes a little. Add meat, salt, allspice and cinnamon. Stir occasionally and fry for 7-8 minutes. Add pine nuts and Mix. Drain the mixture as butter would affect closing the pastries.

For the yogurt sauce :
Strain yogurt using a smooth colander into a pot. Add egg or egg's white.Dissolve cornstarch in 1 cup of water. Stir into cold yogurt for 2 minutes.Place on medium heat, stirring constantly until it boils.

Preparing the Sheesh barak:
Roll out the dough with a rolling pin to about 1 cm thickness. Using a round cookie cutter (medium size), press over dough to get equal rounds.Spread the round a little with your fingers. Place 1 tspn of the filling on it. Fold over one end to make a semi-circle. Press edges down to seal. Take the two ends from the straight side, bring them together and seal them. Press well. Repeat till rounds are done.
Place the stuffed dough and the cut pastries in a tray with parchment, Bake in a hot oven (400F) for 10 minutes or until golden. During this time prepare and cook the yogurt and when it starts to boil add the baked pastries to the boiling cooked yoghurt one by one. Let it boil over low heat for 10 minutes or till pastries are cooked.
In a separate skillet quickly saute the garlic and mint in one tbsp extra virgin olive oil and add it to the Sheesh Barak. And cook for another 2 minutes .

Source: Adapted from Antonio Tahhan.

Monday, 31 August 2009

My Debut in Walima Cooking Club :Iraqi Cuisine- KURAT AL TAMIR and SHAKAR LAMA

Walima cooking club celebrates Middle Eastern cuisine, where every month we go by Latin alphabetical order, choosing two recipes from every Arab country, one savory and one dessert. We can cook any one of them or both. And I really wanted to join this club, because the tag itself says' For all Arabic food lovers' and I just love Arabic food :) So..here is my first challenge. Walima club is celebrating Iraqi cuisine this month.

Iraqi cuisine or Mesopotamian cuisine is Iraq's traditional cuisine developed since antiquity in Me Mesopotamia (Sumer, Akkad, Babylonia, Assyria). It is considered one of the oldest kitchens.
As Baghdad became the centre of the Abbasid Caliphate during the Islamic Golden Age, Muslims and other scholars from many parts of the world came to visit, live and study in Iraq, which gave the Iraqi cuisine new twists to its food. This is most commonly seen in the greater use of spices (e.g. Saffron) used in the Iraqi cuisine in comparison to other Arab cuisines.

Iraqi cuisine has absorbed influences from all the neighboring countries and has much in common with Levantine, Persian, and Turkish cuisines. With the Ottoman rule of Iraq, influences of Turkish cuisine also became incorporated into Iraqi recipes (and vice versa).

Furthermore, as the rest of Iraqi history, the Iraqi cuisine has been deeply influenced by its fertile land between its two rivers Euphrates and Tigris.[1] This influence is seen in Iraq's national dishes.

Now coming to this months challenge. We were given 1 savory and 2 options for sweets -Kurat al tamir ( Date sesame balls) and Shakar Lama (Cardamom cookies) by Arlette. And I tried making both the sweet dishes. Here they are :-

KURAT AL TAMIR ( Date and sesame balls)

Ingredients:
1 pound soft dates
1 cup walnuts
1 cup toasted sesame seeds
2 tablespoons tahini
½ teaspoon cardamom/cinnamon powder

Method:
Add dates, ½ cup sesame seeds, and tahini in the food processor. Pulse and add the walnuts and spices; pulse again. Take the mixture out and make small balls and roll them in toasted sesame or shredded coconuts.


SHAKAR LAMA (Cardamom cookies )

Ingredients:
3 sticks butter
3 1/4 cup all purpose flour
3/4 cup sugar
1 egg yolk (optional)
1 tsp. ground cardamom
1/2tsp. salt
1/3 cup slivered almonds

Method:

Beat the butter in a bowl for 3 minutes. Add sugar and beat the mixture until becomes light in color. Add flour, cardamom and salt gradually. Use your hand to mix the cookie dough. Take a small piece of dough the size of walnut. Shape the cookie and place and almond in the middle. Arrange on a tray with parchment paper. Bake for 20 minutes in 350 degree oven.

LinkWithin

Related Posts with Thumbnails